How to Unclog My Kitchen Sink in 7 Steps
A clogged kitchen sink can bring meal prep and cleanup to a frustrating halt—and you’re not alone; many people struggle with stubborn blockages.
If you’re looking for how to unclog your kitchen sink in 7 steps, these simple methods can help you tackle the problem and prevent future clogs.
Key Takeaways
- Remove the drain cover and clear visible debris using gloves and a small brush or fingers.
- Use a plunger to create an airtight seal and plunge vigorously 15-20 times to dislodge clogs.
- Pour half a cup of baking soda followed by half a cup of vinegar, let fizz for 15-30 minutes, then flush with hot water.
- Detach and clean the P-trap by loosening slip nuts, removing buildup, and reassembling securely.
- Perform a final flush with hot water to clear residual debris and maintain clear pipes.
Clear Visible Debris From the Drain Opening
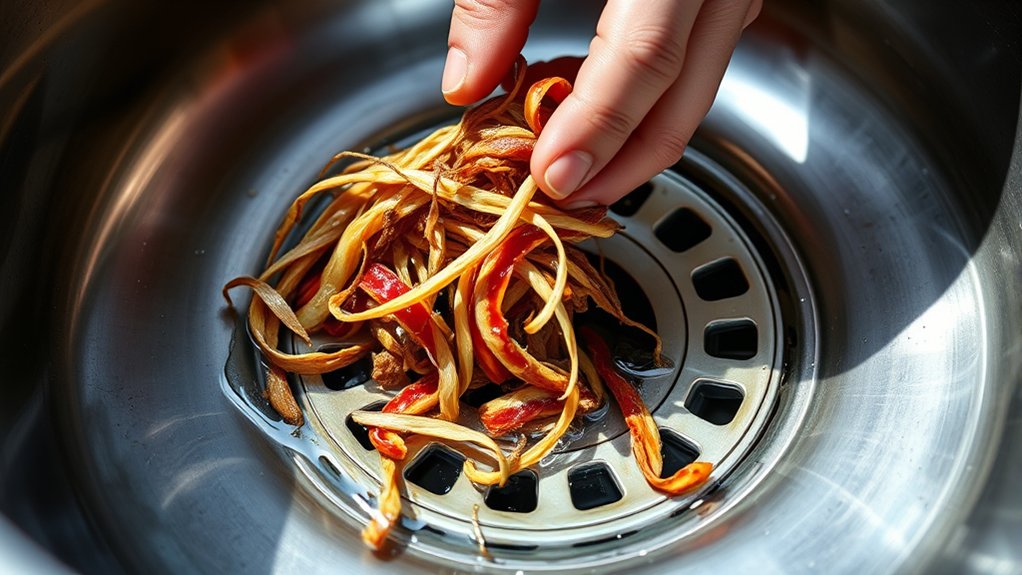
Before you try any tools or chemicals, clear visible debris from the drain opening. Start by removing the drain cover carefully; some covers twist off, while others might need a screwdriver.
Once the drain cover is off, inspect the opening for any food particles, grease clumps, or other debris that might be blocking the flow of water. Use a pair of gloves and a small brush or your fingers to pull out all the gunk you see.
Debris removal at this stage is essential because it can prevent further clogging and make any subsequent steps more effective. Don’t forget to wipe around the drain opening to remove any residue stuck to the edges.
After clearing the visible blockage, replace the drain cover securely. Taking this simple step first can save you a lot of trouble and reduce the need for harsh chemicals or complicated tools later on.
Use a Plunger to Clear Your Kitchen Sink

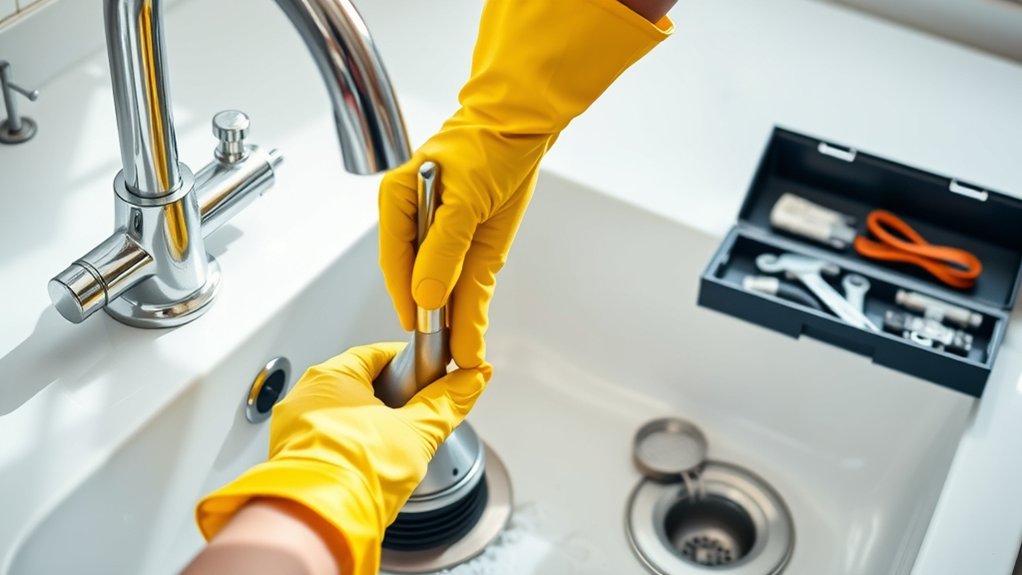
When water still drains slowly after clearing visible debris, grab a plunger to help dislodge the clog. First, guarantee effective sealing by covering the drain completely with the plunger’s cup. This creates the pressure needed to push the blockage through.
Use firm, controlled plunger techniques—push down and pull up without breaking the seal. Repeat this motion about 15-20 times. If your sink has a double basin, seal the other drain with a wet cloth to maximize suction.
| Step | Action |
|---|---|
| 1 | Position plunger over drain |
| 2 | Create an airtight seal |
| 3 | Plunge vigorously 15-20 times |
| 4 | Seal second basin if applicable |
| 5 | Check if water drains freely |
If water still backs up, you may need to try another method, but plunging often clears minor clogs fast.
Use Baking Soda and Vinegar to Clear Your Drain

If plunging doesn’t fully clear the clog, you can try a natural solution using baking soda and vinegar. Start by pouring half a cup of baking soda down the drain, followed by half a cup of vinegar. The mixture creates chemical reactions that help break down grease, grime, and buildup inside your pipes. You’ll notice fizzing and bubbling. That’s the reaction working to loosen the clog.
Let the solution sit for about 15 to 30 minutes to maximize its effectiveness. Then, flush the drain with boiling water to wash away debris. This method is an excellent choice if you prefer eco friendly methods since it avoids harsh chemicals that can damage pipes and harm the environment. Plus, it’s safe for septic systems.
Using baking soda and vinegar is simple, affordable, and often effective for minor clogs. If the clog persists, you may need to explore other steps, but this natural approach is a great next move after plunging.
Remove and Clean the P-Trap Under Your Sink
Although natural solutions can clear many clogs, stubborn blockages often hide in the P-trap beneath your sink. Start by placing a bucket under the P-trap to catch any water.
Then, carefully loosen the slip nuts connecting the trap to the sink drain and the wall pipe. This pipe disassembly allows you to remove the trap completely.
Once detached, inspect the P-trap for any buildup or debris causing the clog. Use a brush or cloth to clean it thoroughly.
Don’t forget to check the trap’s condition during your P trap inspection; cracks or corrosion mean it might need replacing. After cleaning, reassemble the pipes securely, ensuring the slip nuts are tight but not over-tightened.
This step clears out blockages trapped in the curve, which often cause slow drainage. With the P-trap cleaned, you’re one step closer to a free-flowing kitchen sink.
Flush Your Kitchen Sink With Hot Water
Why not use hot water to give your sink a final flush? After clearing the clog and cleaning the P-trap, flushing your kitchen sink with hot water helps wash away leftover debris and grease. This simple step enhances your drain cleaning efforts and keeps sink water flowing smoothly.
Here’s how to do it effectively:
- Boil a kettle or pot of water until it’s steaming hot but not boiling over.
- Slowly pour the hot water directly into the drain opening in stages, allowing it to work through the pipes.
- Repeat this process 2-3 times to ensure all the loosened grime and buildup are flushed out.
Using hot water softens grease and dissolves minor blockages, preventing future clogs. Just be careful not to pour boiling water if your pipes are PVC, as extreme heat can damage them. This quick flush with hot water is a smart move to maintain your sink water flow and promote lasting drain cleaning results.
How to Identify What’s Causing Your Sink Clog
To fix a clogged sink, first figure out what’s causing the blockage. It could be food scraps, grease buildup, or soap residue.
Notice whether the water drains slowly or you hear gurgling sounds. These can be signs that something is stuck in the drain.
Common Clog Causes
When you notice your kitchen sink draining slowly or not at all, understanding the common causes of clogs can help you pinpoint the problem quickly. Here are three frequent culprits:
- Improper disposal: Throwing grease, coffee grounds, or food scraps down the drain can build up and block your pipes over time.
- Pipe corrosion: Older metal pipes may corrode inside, causing rough surfaces that trap debris and reduce water flow.
- Foreign objects: Small items accidentally dropped into the drain can create blockages you might not expect.
Signs of Blockage
How can you tell if your kitchen sink is clogged and what’s causing it? First, look for slow draining water or water pooling in the basin—these are clear signs of blockage. You might notice unpleasant odors coming from the drain or hear gurgling sounds when water flows.
These issues not only disrupt kitchen aesthetics but can also waste water, impacting your water conservation efforts. If the clog is severe, water may back up into the sink or even overflow.
Identifying whether the blockage is from food scraps, grease buildup, or foreign objects helps you choose the right unclogging method. Keep an eye on these signs early to maintain your sink’s function and preserve both your kitchen’s look and your water usage efficiency.
Easy Habits to Keep Your Sink Flowing Smoothly
Although occasional clogs are common, you can prevent most kitchen sink blockages by adopting a few simple habits. Good kitchen organization plays a huge role in keeping your plumbing clear and your sink flowing smoothly. Here are three easy habits you should follow:
- Dispose of food scraps properly – Avoid putting grease, coffee grounds, or fibrous vegetables like celery down the drain. Use a compost bin or trash instead.
- Run hot water regularly – After each use, flush your drain with hot water to help dissolve fats and wash away debris before buildup forms.
- Schedule routine plumbing maintenance – Have a professional inspect and clean your pipes periodically. This proactive step prevents minor issues from turning into major clogs.
Frequently Asked Questions
Can Chemical Drain Cleaners Damage My Pipes?
Yes, chemical drain cleaners can damage your pipes. The strong chemical reactions they cause break down clogs but can also eat away at your pipes over time, leading to pipe deterioration.
If you use these cleaners frequently or in large amounts, you risk weakening the pipe material, especially if you have older plumbing. It’s better to use gentler methods or call a professional to avoid costly damage.
How Often Should I Clean My Kitchen Sink Drain?
You should clean your kitchen sink drain every one to two months to prevent buildup and odors. Regular cleaning frequency helps keep your pipes flowing smoothly and avoids clogs.
For maintenance tips, use a mixture of baking soda and vinegar followed by hot water to break down grease and residue naturally. Also, avoid pouring grease down the drain and use a strainer to catch food particles, making your cleaning routine easier and more effective.
Is It Safe to Use a Drain Snake Myself?
Yes, it’s generally safe to use a drain snake yourself if you’re comfortable with DIY plumbing. Just be careful to avoid damaging your pipes by using the snake gently and following instructions.
However, if the clog is stubborn or you’re unsure, it’s best to seek professional help to prevent causing bigger issues. Knowing when to call an expert can save you time, money, and headaches in the long run.
What Should I Do if My Garbage Disposal Is Clogged?
If your garbage disposal is clogged, first turn off the power to avoid accidents. Use a hex wrench to manually turn the disposal’s motor from underneath, freeing the jam. Avoid using harsh chemicals, as they can damage the unit.
For clog prevention, always run cold water while using the disposal and never put fibrous or starchy foods down it. Regularly grinding small citrus peels can help keep it fresh and clear.
Can Tree Roots Cause Kitchen Sink Clogs?
Absolutely, tree roots can cause kitchen sink clogs like they’re on a mission to take over your pipes! When roots sense moisture, they infiltrate pipes through tiny cracks, causing serious pipe infiltration. This invasion blocks drainage and leads to stubborn clogs in your kitchen sink. You’ll want to address this quickly because those roots can wreak havoc, making your plumbing a tangled mess that’s tough to fix without professional help.
Conclusion
Just like a garden needs tending to bloom, your kitchen sink thrives with a little care. By clearing debris, plunging, and using natural remedies, you’re gently nurturing the flow beneath your countertop.
Removing the P-trap and flushing with hot water acts like pruning, ensuring nothing chokes the roots. Understanding the cause helps you prevent future blockages.
With these steps, you can unclog your kitchen sink and keep it running clear and free, reflecting the harmony of a well-tended home.