How to Replace a Kitchen Sink Drain in 10 Steps
A leaky or worn-out kitchen sink drain can turn a simple cleanup into a frustrating mess. If you’re unsure where to start, you’re not alone.
This guide walks you through how to replace a kitchen sink drain, step by step.
To replace a kitchen sink drain, gather your tools, then shut off the water and clear the cabinet below. Disconnect the P-trap and drain lines before removing the old drain and scraping away residue.
Apply plumber’s putty or silicone to your new drain, then install the assembly and reconnect the P-trap, tightening all fittings by hand.
Finally, run water to test for leaks. Stick around for the full breakdown of each step.
Key Takeaways
- Gather tools and materials, then measure sink opening to choose a properly sized replacement drain.
- Shut off water supply, remove old drain and P-trap, then clean the sink flange area thoroughly.
- Apply plumber’s putty or silicone sealant evenly around the new flange before inserting it into the drain hole.
- Attach gasket, washer, and mounting nut beneath the sink, then connect the tailpiece to the drain body.
- Reconnect the P-trap, tighten all slip nuts, and run water to test for leaks.
Gather the Tools and Materials You’ll Need
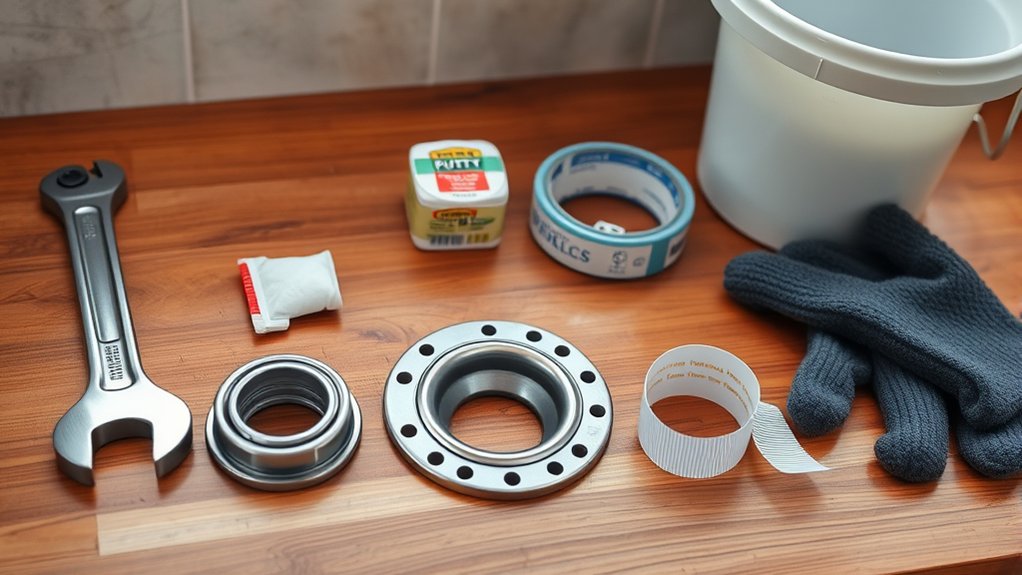
Before you crawl under the sink, round up your tools: a pair of slip-joint pliers, a basin wrench, a putty knife, and a bucket to catch leftover water. You’ll also need plumber’s putty or silicone sealant, a new drain assembly, and a rag for wiping grime off old pipes. Don’t forget plumbing safety gear. Work gloves protect your hands from sharp metal edges and old putty residue.
Check your new drain kit matches your sink’s style and finish, especially if your kitchen decor leans toward brushed nickel, matte black, or classic chrome. Mismatched hardware stands out and ruins an otherwise polished look.
Keep a flashlight handy for checking tight corners under the cabinet, and lay down an old towel to protect your cabinet floor from drips. Having everything within reach before you start saves you from crawling out mid-project. A little prep now means a smoother, faster installation later.
Choose the Right Replacement Drain for Your Sink

Before you buy a replacement drain, measure your sink’s opening to make sure you get the right size. Most kitchen sinks use a standard 3.5-inch drain, but it’s worth checking.
Next, choose a material. Stainless steel resists rust and lasts well, while brass is durable but usually costs more. Plastic is a budget-friendly option, though it may not last as long. As you compare materials, consider your sink’s finish and your budget—matching the materials can affect both the look and performance.
Match Sink Drain Size
Since most kitchen sink drains come in a standard 3.5-inch or 4-inch opening, you’ll want to measure your sink’s drain hole before buying a replacement. Grab a tape measure and check the diameter across the opening’s widest point. This guarantees proper drain compatibility with your fixture.
Sink size matters more than you’d think. A mismatched drain can leak, wobble, or simply refuse to fit, so double-check your measurements before heading to the store.
| Sink Type | Common Drain Size | Notes |
|---|---|---|
| Standard single-bowl | 3.5″ | Most residential kitchens |
| Farmhouse/apron | 4″ | Often requires larger strainer |
| Double-bowl | 3.5″ (each side) | Confirm both openings match |
Buy a drain that matches your measurement exactly for a secure, leak-free fit.
Compare Drain Materials Options
Why does the drain material matter so much? Your choice affects both material durability and aesthetic options, so weigh them carefully before buying a replacement.
Stainless steel remains the top pick for most kitchens. It resists rust, won’t stain, and handles daily wear without degrading. Brass drains offer excellent corrosion resistance too, often lasting decades, though they cost more upfront.
Plastic (PVC) drains work fine for budget projects, but they crack over time and don’t match higher-end sinks visually. If appearance matters, consider finishes like chrome, matte black, or brushed nickel to complement your faucet and fixtures.
Match the drain’s finish to your existing hardware for a cohesive look. Prioritize durability over price if you want a long-term fix instead of a repeat repair job.
Shut Off the Water and Clear Out the Cabinet

Once you’ve decided to replace the drain, locate the shutoff valves under the sink and turn them clockwise until they stop. If you don’t have dedicated valves, shut off your home’s main water supply instead. Open the faucet to release any remaining pressure in the lines, confirming water conservation habits by catching excess water in a bucket rather than letting it drain away.
Next, clear everything out from under the sink. Remove cleaning supplies, trash bags, and any stored items so you have full access to the plumbing. Place a bucket or shallow pan beneath the P-trap to catch residual water when you disconnect the pipes.
Take a moment to inspect your sink material. Stainless steel, cast iron, and composite sinks each have slightly different mounting hardware, which affects how you’ll approach the drain removal. Having a clear, organized workspace makes the entire project go faster and safer.
Disconnect the P-Trap and Drain Lines
Slide a bucket under the P-trap to catch any leftover water. Use slip-joint pliers to loosen the nuts connecting the trap to the tailpiece and drain stub-out. Then unscrew the nuts by hand and pull the trap free, letting any remaining water drain into the bucket.
Place Bucket Underneath
Before you loosen any slip nuts, set a bucket beneath the P-trap to catch the water and gunk that’s been sitting in the pipes. A shallow dish won’t cut it—grab something at least a few inches deep, since standing water and debris from drain cleaning sessions can add up fast. Position it directly under the trap’s lowest point for easy access during sink installation prep.
Keep a few old towels or rags nearby, too. Even with a bucket in place, drips and splashes happen the moment you disconnect fittings. Slide the towels around the base of the cabinet to protect the wood from any spills you miss.
Taking these few extra minutes now saves you a messy cleanup later and keeps the workspace dry while you finish the job.
Loosen Slip Nut Connections
Why do these connections feel so stubborn after years of sitting untouched? Mineral deposits and old plumber’s putty harden around slip nuts, making them resist even firm hands. Grab a pair of channel-lock pliers and turn each nut counterclockwise. If it won’t budge, apply a few drops of penetrating oil and wait several minutes before trying again.
Work your way along the drain assembly, loosening the nut connecting the trap to the tailpiece first, then the one linking it to the wall drain. Keep the bucket positioned below as water and debris spill out. Once loose, slide the nuts up the pipe and pull the trap free.
Remember that slip nut tightening shouldn’t require excessive force later. Overtightening now just creates tomorrow’s stubborn connection.
Remove the Old Sink Drain
Once you’ve disconnected the trap and supply lines, you’re ready to pull the old drain out. Start by removing the locknut beneath the sink that secures the drain body to the basin. Use pliers or a basin wrench if the space is tight. With the locknut off, push up on the drain flange from below while twisting it loose from the sink opening above.
If the old putty or sealant has hardened, you might need a putty knife to break the seal. Scrape away any residue from the sink’s drain hole to create a clean surface for the new installation.
Check the old drain accessories, like the strainer basket or stopper, since you’ll replace these too. If your sink has decorative finishes around the drain opening, be careful not to scratch them during removal.
Once the old unit is free, set it aside and inspect the opening for damage before moving forward.
Clean the Sink Flange Area Thoroughly
After removing the old drain, you’ll likely find a ring of hardened putty, rust, or grime stuck to the sink’s flange area. This buildup prevents a solid seal, so you need to clear it completely before installing the new drain. A clean surface ensures proper adhesion and leak prevention.
- Scrape loose debris: Use a plastic putty knife to lift away old putty without scratching the sink’s finish.
- Apply a degreaser: Spray a kitchen-safe cleaner onto the sink flange to break down grease and grime.
- Tackle corrosion removal: Use a vinegar-soaked rag or fine steel wool to dissolve rust spots around the opening.
- Wipe and dry: Rinse the area with water, then dry it fully with a lint-free cloth.
Once the surface is smooth and residue-free, you’re ready to set the new drain assembly with confidence that it’ll seal properly.
Apply Plumber’s Putty or Silicone Sealant
Because a watertight seal depends on what you put beneath the flange, you’ll need to choose between plumber’s putty and silicone sealant before setting the new drain. Plumber’s putty works well with most sinks and stays pliable, letting you adjust the flange after placement.
Roll it into a rope about the thickness of your finger, then press it evenly around the underside of the flange before inserting it into the drain hole.
If your sink is made of natural stone or has a matte finish, use 100% silicone sealant instead, since putty can stain porous surfaces. For sealant application, apply a thin, even bead around the flange’s underside rather than globbing it on.
Keep drying time in mind: silicone needs several hours to cure properly, so avoid running water or disturbing the seal until it sets. Putty doesn’t require curing time, but excess should be wiped away immediately after tightening.
Install the New Sink Drain Assembly
With the putty or sealant in place on the flange, press the drain assembly firmly into the sink’s drain hole from above. Hold it steady while working beneath the sink to attach the components that secure it. Make sure the flange sits flush and complements your kitchen decor rather than looking crooked or mismatched.
Follow these steps to complete the installation:
- Slide the rubber gasket, then the fiber washer, onto the drain body from underneath.
- Thread the mounting nut onto the drain body by hand until snug.
- Tighten the nut with slip-joint pliers, checking that the flange stays aligned above.
- Wipe away excess putty that squeezes out around the flange’s edge.
Check your local plumbing regulations to confirm you’re using approved materials and connections. Once secure, attach the tailpiece to the drain body, ensuring a tight, leak-free seal before moving on to the trap connection.
Reconnect the P-Trap and Tighten Fittings
With the new drain assembly secured, slide the P-trap back into place and line it up with the drain tailpiece and wall stub-out. Check that each washer is seated inside its slip nut, then push the joints together. Hand-tighten the slip nuts to hold everything in place without stressing the plastic or metal threads.
Align and Reconnect P-Trap
Once your new drain assembly is secure, slide the P-trap back into position and align it with both the tailpiece extending from the sink drain and the stub-out protruding from the wall. Proper alignment prevents strain on the fittings and reduces the risk of future leaks.
- Slip the trap arm into the stub-out and the trap bend onto the tailpiece without forcing the connection.
- Hand-tighten the slip nuts first to confirm proper alignment before using pliers.
- Check that washers sit flush inside each nut for a watertight seal.
- Run water through the drain to test for leaks, addressing any drips immediately with minor leak repair.
Regular drain cleaning afterward helps maintain smooth flow and prevents buildup that could strain your newly connected P-trap.
Hand-Tighten Slip Nut Fittings
Because slip nuts rely on compression rather than brute force, you’ll get the best seal by threading each one onto its fitting by hand before reaching for pliers. Hand-tightening lets you feel whether the threads are catching properly, preventing cross-threading that can crack plastic fittings or strip metal ones.
Turn each nut clockwise until it stops moving easily, then check that the washer sits flush against the connection point.
Slip nut tightening varies slightly depending on your setup. A quick drain material comparison shows that PVC fittings tighten smoother than metal, which can bind if forced too early. Work your way around every joint, snugging each nut by hand first.
Once everything’s hand-tight and aligned, you’re ready for a final quarter-turn with pliers to lock the seal.
Test the New Drain and Fix Common Problems
After you’ve tightened every connection, run water through the drain for a few minutes to check for leaks. Fill the sink partway, then release the water all at once to mimic real-world pressure. Check every joint with a flashlight and dry paper towel, since even small drips show up fast.
A quick flashlight check and a dry paper towel will catch even the smallest drip before it becomes a real problem.
If you spot moisture, don’t panic. Leak troubleshooting usually comes down to one of these fixes:
- Loose slip nuts: Tighten by hand first, then add a quarter-turn with pliers.
- Misaligned pipes: Loosen the nut, straighten the pipe, and retighten.
- Missing or damaged washers: Replace any cracked or warped gaskets.
- Cross-threaded fittings: Back off completely and rethread by hand.
Once everything runs dry, give the drain a final flush. Routine drain cleaning afterward keeps slow clogs from putting unnecessary strain on your new connections.
Frequently Asked Questions
How Long Does It Take to Replace a Kitchen Sink Drain?
You’ll typically spend 30 to 60 minutes replacing a kitchen sink drain, depending on your experience and the condition of existing pipes. If you’re also tackling drain cleaning or noticing corrosion during removal, add extra time for thorough pipe maintenance. Don’t rush—you’ll want to make certain every connection’s tight and properly sealed. With basic tools and a little patience, you’ll have a fully functional drain installed without needing professional help.
Can I Use Plumber’s Putty on a Stainless Steel Sink?
Yes, you can slather plumber’s putty under your stainless steel sink flange like you’re icing a thousand-layer cake! It creates a watertight seal that’ll outlast your sink itself.
Just press a rope of putty around the drain opening, set it in place, and tighten from below. Wipe away the glorious excess that oozes out.
Stainless steel handles plumber’s putty beautifully. Just avoid silicone-based putties that might discolor the finish over time.
Do I Need to Call a Plumber for This Job?
No, you don’t need to call a plumber for this job. Replacing a kitchen sink drain is a manageable DIY project if you’ve got basic skills and patience.
You don’t need professional tools—just a few basics like pliers, a basin wrench, and plumber’s putty. Follow some simple DIY tips: work slowly, keep towels handy for drips, and double-check connections before running water.
If leaks persist after your attempt, that’s when calling a plumber makes sense.
How Often Should Sink Drains Be Replaced?
Honestly, a sink drain can practically last a lifetime if you treat it right! You don’t need to replace it on a strict schedule. Just watch for warning signs.
Regular drain cleaning keeps clogs and buildup from causing bigger issues, while catching pipe corrosion early can save you from a messy leak. If you notice rust, persistent odors, or slow drainage despite cleaning, it’s time to swap it out.
What Causes a Sink Drain to Leak After Installation?
Most leaks happen because you didn’t tighten the drain properly or applied sealant incorrectly. If you rush drain tightening, the nut won’t compress the washer enough, leaving gaps where water seeps through.
Likewise, skimping on sealant application—or using too little plumber’s putty—fails to create a watertight barrier around the flange. You’ll also run into trouble if you don’t let the sealant cure before running water. Always double-check both steps before testing your sink.
Conclusion
You’ve just given your kitchen sink a new lease on life. By working through each step, from gathering tools to testing your final connections, you’ve tackled a repair that once seemed intimidating. Don’t rush the process; take your time with the putty, fittings, and alignment.
Run water through the drain, check for leaks, and trust your hands-on effort. You’re not just fixing a sink; you’re building confidence for the next project. Replacing a kitchen sink drain is a rewarding DIY repair you can feel proud of.