How to Organize a Small Kitchen
Small kitchens can quickly feel crowded, especially when every drawer and cabinet is already full. You’re not alone—many people struggle to keep limited space organized while still making everyday essentials easy to reach. The right storage products can make a noticeable difference.
To organize a small kitchen, declutter expired, damaged, duplicated, and unused items first. Group essentials by routine, keeping coffee supplies, breakfast items, cooking tools, and lunch containers together.
Give frequently used items homes near where you use them, and store heavier cookware low. Add shelf risers, drawer dividers, wall rails, hooks, and door racks to maximize space.
Clear countertops, keeping only daily essentials visible. Return items after use, and you’ll uncover more practical solutions below.
Key Takeaways
- Declutter cabinets, drawers, and countertops by removing expired, damaged, duplicated, and rarely used items.
- Group essentials into dedicated zones based on routines, keeping frequently used tools near preparation and cooking areas.
- Maximize cabinet capacity with shelf risers, dividers, pull-out shelves, vertical organizers, and stackable storage.
- Use vertical and overlooked spaces, including doors, walls, corners, and undershelves, for racks, hooks, shelves, and slim carts.
- Maintain organization by returning items immediately, labeling containers, and reviewing storage systems monthly.
Declutter Your Small Kitchen First
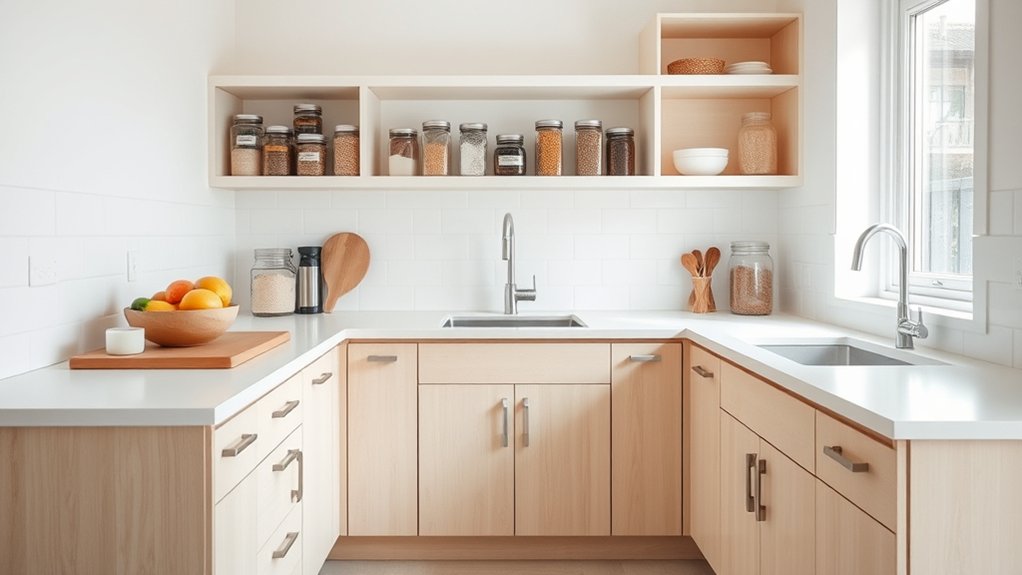
Start by removing everything you don’t use, need, or love from your small kitchen. Empty one cabinet or drawer at a time, then examine each item honestly. If you haven’t used something in a year, it’s chipped, duplicated, or difficult to clean, let it go. Donate useful pieces, recycle suitable materials, and discard anything unsafe.
Declutter one cabinet or drawer at a time, keeping only useful, loved, and safe kitchen essentials.
Next, clear your counters. Keep only essentials you use daily, such as a coffee maker or knife block. Store occasional appliances elsewhere, or release them if they take more space than they’re worth.
Check your pantry and refrigerator, too. Toss expired food and ingredients you’ll never use, then wipe every surface.
As you declutter, notice what remains. Choose pieces that support your cooking habits and complement your preferred style. Minimalist decor works best when every visible object earns its place.
Finally, use color coordination to spot mismatched, unnecessary items and create a calmer, more intentional kitchen.
Group Items by How You Use Them

Group items by how often you use them and where you use them. Keep everyday essentials together so they’re easy to grab. Create dedicated cooking zones to help each task flow smoothly.
Store Daily Essentials Together
Keep the items you use together in the same area so your kitchen supports your daily routines. Place coffee, mugs, filters, and sweeteners in one cabinet or on a nearby tray.
Keep breakfast staples, bowls, and utensils together so you won’t search through several drawers each morning. Store lunch containers, wraps, and reusable bags side by side for faster packing.
For meal prep, group measuring cups, mixing bowls, and frequently used ingredients where you can reach them easily. Use clear bins to gather snacks, baking supplies, or canned goods, and add pantry labels so you’ll know exactly where everything belongs.
Return each item to its group after use. Keep daily essentials at comfortable heights, while reserving higher or deeper storage for items you use less often.
This simple arrangement saves time and reduces clutter.
Create Dedicated Cooking Zones
Arrange your kitchen into zones based on how you cook, placing preparation tools near your main counter, pots and pans beside the stove, and plates and serving utensils close to the dining area.
Keep knives, cutting boards, measuring cups, and mixing bowls together so you won’t waste steps gathering supplies.
Store spices, oils, and frequently used utensils within easy reach of your cooking zone. Use drawer dividers, wall rails, or shelf risers to maximize limited space without creating clutter.
Good kitchen ergonomics means keeping heavy cookware at waist level and positioning appliances near the outlets you use most.
For cooking safety, turn pot handles inward, leave clear counter space beside hot burners, and keep towels away from flames.
Arrange each zone around your routine, then adjust it as your habits change.
Give Frequently Used Items a Home

Give frequently used items a designated home near where you use them. Keep your favorite knife beside the prep area, place measuring cups near your mixing space, and store mugs close to the coffee maker. When each item has a clear destination, you’ll spend less time searching and more time cooking.
Use a small tray, crock, or wall-mounted rail to keep daily tools contained without crowding your workspace. Reserve the easiest-to-reach spots for items you grab constantly, while less-used tools can stay farther away.
Label storage containers if several hold similar ingredients or utensils, and make labels easy to read at a glance. Color coding can help every household member return items correctly. Assign one color to baking tools, another to coffee supplies, and a third to lunch gear.
After using something, put it back immediately. If an item repeatedly lands elsewhere, move its home closer to that spot so your system matches your habits.
Optimize Cabinets in a Small Kitchen
Once frequently used items have a clear home, make your cabinets work harder by assigning each shelf and drawer a purpose. Store heavier cookware low, everyday dishes at chest height, and occasional gadgets in harder-to-reach spaces.
Group items by task so you won’t hunt for supplies while cooking. Use shelf risers inside cabinets to create levels, and add pull out shelves to reach cans, pans, and appliances without unloading everything.
Install cabinet lighting beneath shelves or inside dark corners, helping you spot ingredients quickly. Keep lids upright with a slim divider, and use shallow bins to contain small packets.
| Cabinet zone | Best use | Helpful upgrade |
|---|---|---|
| Lower shelves | Pots and pans | Pull out shelves |
| Eye-level shelves | Plates and bowls | Shelf risers |
| Upper shelves | Serving pieces | Cabinet lighting |
| Deep drawers | Utensils and tools | Dividers |
Measure before buying organizers, and leave enough clearance for doors and drawers to open smoothly. Review each cabinet monthly and relocate anything you rarely use.
Add Vertical Storage to Walls and Doors
You can free up counter space by installing wall-mounted shelves for dishes, spices, or pantry staples. Door-mounted racks are great for storing lids, wraps, and cleaning supplies, while hanging utensils vertically keeps them within easy reach. These simple upgrades help you make the most of every inch without overcrowding your cabinets.
Install Wall-Mounted Shelves
Wall-mounted shelves add valuable storage without taking up your limited counter or floor space. Choose sturdy Wall mounted shelves that fit your kitchen’s width, then measure carefully before drilling.
Use a level to keep each shelf straight, and anchor brackets into studs whenever possible. For drywall, select anchors rated for the shelf and its expected load.
Keep frequently used plates, mugs, or spices within easy reach, while storing occasional-use appliances on higher shelves. Group similar items in attractive bins or baskets to prevent clutter and simplify Kitchen organization.
Leave enough space between shelves for tall containers, and avoid overloading them. Wipe surfaces regularly, especially near the stove, where grease accumulates.
With thoughtful placement, you’ll free cabinets, improve visibility, and make your kitchen feel more open.
Use Door-Mounted Racks
When shelves aren’t enough, door-mounted racks turn cabinet and pantry doors into useful storage. Choose slim door mounted racks that fit securely without blocking shelves or preventing doors from closing.
Use them to hold spices, oils, packets, cleaning supplies, or small jars, keeping frequently used items within easy reach. For effective spice jar organization, arrange containers by type or frequency of use, and place labels where you can read them quickly.
Measure your door and available clearance before buying a rack, especially beneath sink cabinets. Select adjustable shelves or narrow baskets to accommodate different container sizes.
Secure heavy items near the bottom, and avoid overloading hinges. Check the rack regularly for loose hardware, so your added storage stays stable, accessible, and safe in your small kitchen.
Hang Utensils Vertically
Add vertical storage to free up valuable counter and drawer space in a small kitchen. Install a sturdy rail, pegboard, or adhesive hooks on an open wall, cabinet side, or pantry door.
Hang frequently used tools where you can grab them quickly, rather than burying them in crowded drawers. Arrange vertical utensils by purpose, keeping spatulas together and measuring tools near your prep area.
Choose hooks that support each item’s weight, and leave enough space between tools for easy removal. For practical hanging storage, consider these simple guidelines:
- Place everyday utensils at eye level for faster access.
- Group similar tools to make cooking and cleanup easier.
- Use matching hooks or containers to keep the display tidy.
Check adhesive mounts regularly, especially in humid kitchens. You’ll gain workspace while turning unused wall and door surfaces into an organized, convenient storage system.
Rotate seasonal tools to maintain accessibility.
Organize Drawers in a Small Kitchen
How can you make every drawer work harder in a small kitchen? Start by emptying one drawer at a time and grouping similar items. Keep daily tools near your main prep area, while rarely used gadgets can go in a less accessible drawer. Remove duplicates, damaged utensils, and anything you never use.
Use adjustable drawer dividers to create clear sections for cutlery, measuring tools, peelers, and cooking utensils. Choose slim, sturdy organizers that fit the drawer’s dimensions without wasting space.
Store items upright or in shallow layers so you can see everything immediately. Place small objects, such as clips or spare corks, in narrow containers to stop them from shifting.
Apply simple labeling techniques to containers or drawer edges, especially when several drawers hold similar supplies. Labels help every household member return items correctly.
Review your system monthly because changing routines can create clutter. Leave a little open space in each drawer so you can put things away quickly without forcing them inside.
Clear and Simplify Your Countertops
Clear your countertops by removing appliances, tools, and décor you rarely use. Keep everyday essentials, like your coffee maker or knife block, close at hand. Group them together to keep your workspace tidy and efficient.
Remove Unused Items
Start by removing anything you rarely use from your countertops, such as duplicate tools, decorative items, and appliances reserved for special occasions. Check cabinets and drawers for items you’ve forgotten, too.
Removing expired food creates space and keeps your kitchen safer. Set aside equipment you haven’t used in a year, then decide whether to donate, recycle, or discard it.
Donating unused utensils can help someone else while reducing clutter in your home.
- Keep only tools that support meals you regularly prepare.
- Move seasonal equipment to a labeled storage area.
- Let go of damaged, duplicated, or inconvenient items.
Before removing anything, wipe each cleared surface and inspect the item’s condition. If you’re unsure, place it in a box for thirty days.
If you don’t retrieve it, you likely don’t need it. A simpler countertop makes cleaning easier and gives your small kitchen more breathing room.
Group Daily Essentials
Keep the items you use every day together in one convenient area, such as a tray or a designated section of the counter. Group your coffee gear, favorite utensils, and frequently used appliances so you won’t waste time searching.
Use a small caddy for Meal prep tools, and store cleaning supplies beneath the sink rather than beside food. Limit each group to essentials, then return everything after use. This habit keeps countertops clear and makes your kitchen easier to maintain.
| Group | Store Here | Benefit |
|---|---|---|
| Coffee | Tray | Faster mornings |
| Meal prep | Utensil cup | Easier cooking |
| Cleaning | Under sink | Clear counters |
Choose containers that fit your available space, label them if helpful, and leave a little empty room. You’ll spot clutter quickly and prevent daily essentials from spreading across the kitchen.
Store Pots, Pans, and Lids Efficiently
When you store pots, pans, and lids by frequency of use, you’ll save space and make cooking easier. Keep your everyday skillet and saucepan within easy reach, while placing specialty cookware higher or farther back.
Organize cookware by frequency of use, keeping everyday essentials accessible and specialty pieces stored higher or farther back.
Choose stacking solutions that protect surfaces: nest pans with soft separators, or use a sturdy rack to prevent scratching and improve access.
For effective lid storage, stand lids vertically in a narrow organizer rather than piling them beneath cookware. Match each lid to its pot, and discard damaged pieces that waste valuable room.
Arrange your cabinet so every item slides out without forcing you to unpack the stack.
- Nest compatible pots with cloth or silicone separators.
- Store pans vertically when cabinet height allows.
- Label shelves if multiple sizes look similar.
Use shelf risers to create a second level for shallow pans, but keep heavy cookware low and stable.
After cooking, return each piece to its assigned spot immediately. Consistent habits keep your small kitchen orderly and efficient.
Turn Awkward Corners Into Storage
Awkward corners can become useful storage when you fit them with narrow shelves, corner racks, or a slim rolling cart. Measure each gap first, then choose storage that leaves doors, drawers, and walkways clear.
Use corner shelving to hold spices, oils, mugs, or frequently used small appliances. Adjustable shelves let you customize each level, while a turntable keeps items at the back within reach.
For a deep corner, install a diagonal shelf or use angled storage designed to follow the wall line. These options create accessible surfaces without wasting valuable floor space.
A tall, narrow cabinet can store baking supplies, cutting boards, or serving pieces. If you rent, choose a freestanding unit or tension shelves instead of drilling into walls.
Add hooks beneath a shelf for measuring cups, utensils, or lightweight pans. Keep the heaviest items on lower levels and reserve upper shelves for things you use less often.
With the right dimensions, even an awkward corner can work harder.
Keep Your Small Kitchen Organized
A small kitchen stays organized when every item has a designated home and you return it after use. Start by clearing counters each evening, wiping surfaces, and checking that frequently used tools remain within easy reach.
Keep counters clear, wipe surfaces nightly, and give every kitchen item a convenient, consistent home.
Store occasional appliances higher up, and keep matching lids with their containers to prevent clutter from spreading.
Use a simple weekly reset to protect your space:
- Sort pantry items and discard expired food.
- Group utensils, cookware, and cleaning supplies by task.
- Review drawers and donate duplicates you never use.
Good kitchen lighting helps you spot crumbs, spills, and misplaced items before they become problems. Choose bright, focused fixtures over crowded countertop lamps.
Add appliance maintenance to your routine by cleaning filters, checking cords, and removing buildup according to each manufacturer’s instructions. You’ll improve performance and avoid unnecessary replacements.
Finally, ask yourself whether each item earns its space. If it doesn’t, remove it.
Consistent small habits will keep your kitchen functional, calm, and ready for the next meal.
Frequently Asked Questions
How Can I Organize a Small Kitchen on a Limited Budget?
You can organize a small kitchen cheaply by decluttering first and keeping only what you use. Add shelf risers, hooks, and a tension rod to create vertical storage without remodeling.
Reuse jars or boxes for pantry labeling, so you’ll find ingredients quickly. Store similar items together, place daily essentials within reach, and use cabinet doors for lightweight tools.
Shop thrift stores, dollar stores, and your home before buying organizers. Review your setup monthly.
What Are the Best Storage Solutions for Renters?
Renters need storage solutions that add space without adding damage, because apparently walls prefer staying empty. Use removable adhesive hooks, tension rods, over-the-door organizers, and freestanding shelves to create flexible storage.
Stack bins inside cabinets, hang a magnetic strip for metal tools, and choose rolling carts for narrow gaps. Keep Kitchen decor coordinated with baskets and labels.
Plan Appliance placement carefully, grouping frequently used items while preserving counters and walkways. These upgrades move easily when you do.
How Do I Childproof an Organized Small Kitchen?
Start with Child safety by securing cabinets and drawers with latches, especially those holding cleaners, knives, glassware, or heavy cookware.
Use appliance placement to keep cords, hot surfaces, and controls out of your child’s reach. Move small appliances toward the back of counters, unplug them after use, and install stove knob covers.
Anchor shelves, keep stools inaccessible, and create a designated low drawer for safe items your child can investigate.
Which Kitchen Organization Products Are Worth Buying?
The best kitchen organization products earn their space by solving multiple problems. Start with stackable, airtight containers that keep food fresh and fit neatly in cabinets.
Choose eco-friendly containers made from glass or recycled materials. Add adjustable shelf risers, drawer dividers, and a slim rolling cart for overlooked gaps.
Multipurpose tools, such as nesting measuring cups and a grater with storage, reduce clutter. Skip single-use gadgets and measure your space first.
How Often Should I Reorganize My Small Kitchen?
Reorganize your small kitchen every three to six months, or whenever clutter slows you down. Review drawers, cabinets, and countertops during seasonal changes, after buying new appliances, or when your cooking habits shift.
Include Meal prep supplies in your review, keeping frequently used items within easy reach. Your Cleaning routines should also guide adjustments: store everyday tools accessibly and group occasional-use items elsewhere.
A quick monthly reset prevents larger reorganizing projects later.
Conclusion
With a few thoughtful adjustments, you can make your small kitchen feel remarkably spacious and easy to use. Letting go of seldom-used items, assigning everything a home, and making the most of vertical and hidden storage will simplify your routine.
Keep countertops clear, group essentials nearby, and revisit your system as your needs change. Even awkward spaces can serve a purpose when approached creatively. With gentle editing, learning how to organize a small kitchen can help create an efficient, welcoming part of your home.