How to Pack Your Kitchen for Moving
Moving can make packing your kitchen feel overwhelming, especially when you’re unsure what to keep, protect, or pack first. You’re not alone; many people struggle with organizing fragile dishes, bulky cookware, and everyday essentials.
With the right approach, learning how to pack your kitchen for moving can make the process much smoother.
To pack your kitchen for moving, declutter first and donate or discard damaged, expired, duplicate, and incomplete items. Gather sturdy boxes, packing paper, bubble wrap, tape, markers, and dividers.
Pack rarely used items before wrapping dishes individually and stacking plates vertically. Cushion cookware, secure appliance parts, and protect knives separately.
Seal liquids upright and place spices in labeled bins. Mark every box clearly, then prepare an essentials box for immediate meals and cleaning.
The steps below will help you stay organized.
Key Takeaways
- Gather sturdy boxes, packing paper, bubble wrap, tape, labels, dividers, and protective materials before packing.
- Declutter room by room, discarding expired food, broken items, duplicates, and unmatched containers.
- Wrap dishes and glassware individually, stack plates vertically, and clearly label fragile boxes.
- Pack appliances, knives, liquids, and heavy items securely, cushioning parts and placing heavier items at box bottoms.
- Label every box with its destination and contents, and prepare a separate kitchen essentials box for immediate use.
Gather Supplies for Packing Your Kitchen

Before you start packing, gather sturdy boxes in several sizes, packing paper, bubble wrap, packing tape, resealable bags, markers, and labels. Choose small boxes for heavy cookware and larger ones for lightweight appliances, linens, and serving pieces.
Gather sturdy boxes, cushioning materials, tape, labels, and resealable bags before packing, choosing box sizes suited to each kitchen item.
Add cardboard dividers or cell kits to protect glasses, mugs, and bottles. Use towels, dishcloths, or clean clothing as extra cushioning, and keep a permanent marker nearby for clear box labels.
Prepare zip-top bags for appliance cords, screws, manuals, and other small parts. If you have specialty cooking tools, such as a mandoline, rolling pin, or thermometer, gather suitable padding before packing them.
Consider your kitchen design when selecting box sizes. Long containers may need tall cartons, while bulky gadgets require wider boxes.
Keep a utility knife, scissors, and measuring tape accessible. Finally, create a packing station with enough space to wrap items safely and seal boxes securely.
Declutter and Sort Kitchen Items

With your supplies ready, sort through every kitchen item before wrapping and boxing it. Work one area at a time, and create four groups: keep, donate, recycle, and discard.
Check dishes, cookware, gadgets, storage containers, and small appliances for damage, duplicates, or missing parts. If you haven’t used something in a year, question whether it deserves space in your new kitchen.
Keep only items that support your cooking habits and household needs.
While organizing pantry shelves, check expiration dates, combine open packages, and discard stale or damaged food. Donate unopened, unexpired items you won’t use before moving.
Match container lids with their bases, and let go of extras that don’t have partners. During sorting utensils, remove bent tools, duplicates, and gadgets you rarely use.
Set aside valuable or fragile pieces for careful packing later, but don’t pack them yet. Label donation boxes clearly, and dispose of broken items responsibly.
A focused sort reduces clutter, packing time, and moving costs.
Pack Rarely Used Kitchen Items First
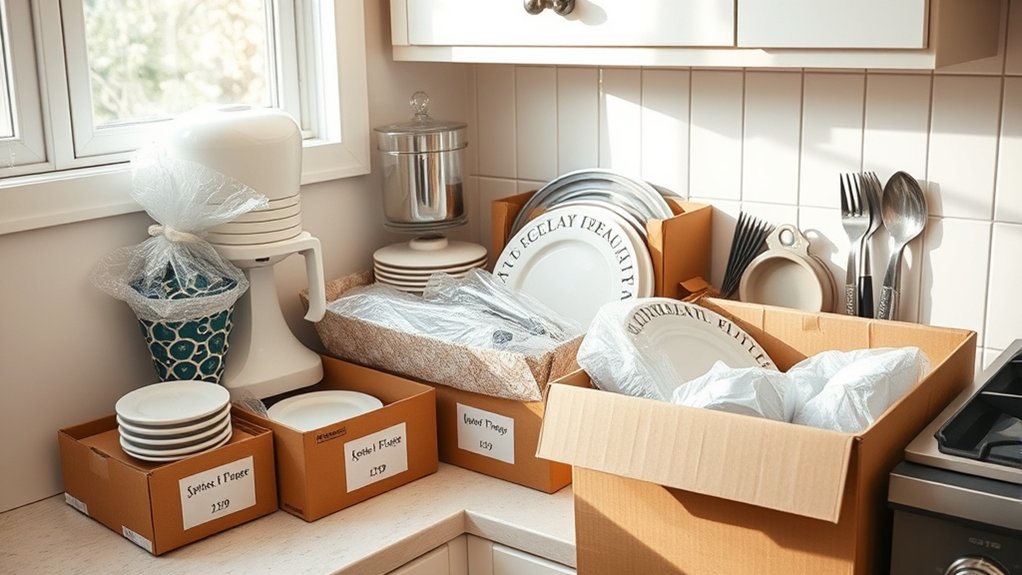
Start with rarely used kitchen items, such as specialty appliances, serving dishes, seasonal bakeware, and extra glasses. Packing these first clears space for everyday essentials and reduces last-minute work.
Group items by function, then label each box with its contents and destination.
| Category | Packing Action | Label |
|---|---|---|
| Specialty appliances | Remove accessories and cords | Small Appliances |
| Seasonal bakeware | Nest compatible pieces | Seasonal Storage |
| Extra serving dishes | Group by occasion | Entertaining |
| Vintage collections | Inventory valuable pieces | Handle With Care |
Use sturdy, appropriately sized boxes so heavy equipment doesn’t strain the containers. Fill empty spaces with clean towels or paper to prevent shifting.
Don’t wrap dishes or glassware yet; handle that task in the next step. Keep appliance manuals, detachable parts, and chargers together in clearly marked bags.
Place seasonal storage boxes toward the back of your moving area, while vintage collections stay accessible for careful inspection.
Photograph valuable items before sealing boxes, and note their condition on your inventory list. You’ll find packing progress easier to track when rarely used items leave your kitchen first.
Wrap Dishes and Glassware Safely
Wrap each dish and glass individually with clean packing paper, giving extra attention to rims, handles, and other fragile edges. Tuck the paper around each item, then secure it with tape or place it inside a small box.
Wrap dishes and glasses individually, securing paper around fragile edges to prevent chips and breaks during moving.
For effective dish padding, line the bottom of a sturdy carton with crumpled paper or bubble wrap. Stack plates vertically, like records, rather than flat, and add paper between them. Keep heavier pieces below lighter ones.
For glassware wrapping, fill each glass with crumpled paper before covering its outside. Wrap stems, bases, and handles separately, since these areas break easily.
Place glasses upright in divided boxes, leaving space between them and the walls. Fill gaps with soft packing material so nothing shifts when you move the carton.
Don’t overpack; the box should close without pressure. Label it “Fragile: Glassware” and mark the top, so you’ll handle it carefully during loading and unpacking.
Check every item for chips before wrapping it.
Protect Pots, Pans, and Cookware
Protect your pots, pans, and cookware by wrapping each piece securely. When stacking them, place padding between items to prevent scratches. Be sure to protect the handles and lids from damage or breakage, too.
Wrap Each Piece
Before placing pots, pans, or cookware in a box, wrap each piece in packing paper, a clean dish towel, or bubble wrap to prevent scratches and dents. Cover handles, rims, and exposed surfaces carefully, securing the material with low-tack tape or twine.
Don’t use newspaper directly against light-colored enamel or stainless steel because ink can transfer. For cast iron, add a dry paper layer first, then wrap it fully to limit moisture exposure and rust.
Protect lids separately, paying attention to knobs and edges. Wrapping also keeps grease residue from spreading to nearby items.
As you prepare cookware, inspect it for chips, loose handles, or worn coatings. This simple check supports Appliance maintenance before the move.
You can even reuse attractive towels that complement your Kitchen decor, reducing waste.
Stack With Padding
Stack pots and pans from largest to smallest, placing a layer of padding between each piece to cushion surfaces and prevent scratches. To stack with padding, use clean dish towels, packing paper, or foam sheets.
Keep heavier cookware at the bottom and avoid forcing pieces together.
- Add padding around cast-iron cookware to protect nearby items.
- Use thicker towels between nonstick surfaces.
- Fill empty spaces with crumpled paper so cookware won’t shift.
- Choose a sturdy box that supports the combined weight.
Once your stack feels stable, place it in the box’s center, away from the walls. Add padding around all sides and above the cookware before closing the carton.
Don’t overfill the box. Excessive weight can split the bottom or make lifting unsafe.
Gently test for movement, then secure with bubble wrap around the padded stack. Label the box clearly as heavy cookware.
Protect Handles and Lids
Wrap pot and pan handles with packing paper or soft towels to prevent them from scratching nearby cookware or tearing the box. Secure the padding with tape, but don’t stick adhesive directly to your cookware.
For extra protection, use handle covers on sharp, protruding, or removable handles before placing pans in a sturdy box. Nest smaller pots inside larger ones, adding a towel between each piece to cushion contact and keep handles from pressing against other surfaces.
Protect every lid separately, especially glass lids. Place a sheet of packing paper over each lid, then add a towel or bubble wrap layer.
Lid protectors can help prevent chips, cracks, and scratches during transit. If a lid has a knob, wrap that area generously and position the lid upright or flat according to its shape. Fill empty spaces so nothing shifts.
Pack Small Kitchen Appliances Safely
Small kitchen appliances need careful packing to prevent cracks, dents, and damage to cords or controls. Unplug each item, let it cool completely, and wipe away crumbs or grease.
This simple appliance maintenance step keeps dirt from spreading through your boxes. Remove detachable parts, wrap them separately, and secure cords without bending them sharply.
- Use original boxes and molded inserts whenever possible.
- Choose sturdy cartons that leave little room for movement.
- Fill gaps with towels, packing paper, or bubble wrap.
- Label each box with its contents and “Fragile” handling instructions.
Your storage container selection matters. Avoid oversized boxes that encourage shifting, and don’t overload smaller cartons.
Place heavier appliances, such as mixers, at the bottom, then add lighter items above them. Cushion switches, screens, and glass components with soft padding.
Seal accessories in labeled bags and tape those bags inside the appropriate box. Keep appliance manuals and cords together so setup goes smoothly after the move.
Don’t stack boxes where they could fall or get crushed. Inspect every packed appliance before loading the moving vehicle, and carry delicate items yourself when practical.
Wrap Knives and Sharp Tools Safely
Before packing, clean and dry each knife or sharp tool, then protect its blade with a sheath, cardboard, or several layers of packing paper. For extra knife safety, wrap the protected blade in a towel or bubble wrap, and secure the material with packing tape. Don’t leave tape touching the blade, because residue can cause damage.
Clean and dry sharp tools, cover their blades securely, and add protective wrapping without letting tape touch the metal.
Group similar tools together, but keep knives separated from other items. Place wrapped knives in a sturdy box, with handles facing one direction and blades positioned away from the box’s edges. Fill gaps with crumpled paper so nothing shifts during transport.
Label the package “Sharp, Handle With Care,” and keep it separate from fragile glassware.
For safe sharp tool storage, consider a dedicated knife block, padded container, or rigid plastic case. Check that every point and edge stays fully covered before sealing the box.
Carry the box carefully, and tell movers exactly what it contains. Never pack uncovered blades loosely, even inside a small utensil drawer.
Pack Food, Spices, and Liquids Without Leaks
Once sharp tools are secured, turn to pantry items and liquids, which can spill, stain, or attract pests during the move. Check expiration dates and discard opened, stale, or damaged packages.
Keep dry goods in sturdy, sealed containers as part of practical food storage, especially flour, sugar, rice, and cereal. Tighten every lid, then place each bottle or jar in a resealable bag.
Add a second bag for oils, sauces, and anything likely to leak.
- Wrap glass jars in towels or paper for cushioning.
- Stand bottles upright in a small box.
- Fill gaps with crumpled paper so containers don’t shift.
- Keep spices together in a lidded bin for easy spice organization.
Avoid packing perishables unless you can transport them quickly in a cooler. Freeze or refrigerate items according to their safety needs, and wipe container exteriors before boxing them.
Don’t overfill cartons; excessive weight can crush packages and force lids open. Keep cleaning chemicals separate from food to prevent contamination.
Label Kitchen Boxes by Room and Contents
Label each box with its destination room so movers know where to put it. Clearly list the main contents, including fragile items and essentials you’ll need right away. This system will make unpacking faster and less stressful.
Label by Destination Room
As you pack each kitchen box, mark its destination room and list its main contents on two adjacent sides. Use large, waterproof labels so movers can read them from any angle.
Assign boxes to the kitchen, dining area, pantry, or another room before taping them shut. A destination label helps everyone place items quickly and prevents unnecessary searching after arrival.
- Kitchen: cookware, utensils, and appliances
- Pantry: cans, spices, and baking supplies
- Dining area: serving pieces and table linens
- Living room: fragile Kitchen decor and display items
Keep labels consistent by using the same room names on every box. You can add color-coded tape for faster sorting, but don’t rely on color alone.
If a box includes items needed immediately for specific Cooking techniques, place it in the kitchen and mark it for easy access.
List Box Contents Clearly
Clear room labels tell movers where a box belongs, while a concise contents list tells them what’s inside. Write the destination room in large letters, then add two or three specific items, such as “Kitchen: mixing bowls, measuring cups, and whisk.” You’ll find what you need faster without opening every carton.
Use a permanent marker on two sides and the top, so labels remain visible when boxes stack. Number cartons if you’re packing several boxes of similar supplies, and keep a matching inventory on your phone.
Note fragile items and the correct upright position, but don’t overload the label with details. Group related tools together, such as baking equipment or utensils for specific cooking techniques.
If you’re following kitchen design trends, identify décor, organizers, and appliances separately to simplify unpacking and placement.
Prepare a Kitchen Essentials Box
Set aside a clearly marked kitchen essentials box with the items you’ll need on moving day and the morning after. Keep it separate from packed boxes so you can grab it immediately, even if everything else is stacked in a truck or storage unit.
Use your Moving checklist to choose practical basics, and adjust the contents for your household’s routines. Include enough supplies for simple meals, drinks, cleanup, and minor emergencies:
- Paper plates, bowls, cups, napkins, and disposable utensils
- Coffee, tea, sugar, snacks, and a few easy breakfast foods
- A can opener, small knife, cutting board, and one multipurpose pan
- Dish soap, a sponge, paper towels, trash bags, and hand sanitizer
Add medications, pet food, and children’s essentials if needed. Label the box on every side, then place it in your personal vehicle rather than the moving truck.
Good Kitchen organization starts with knowing exactly where your first-day necessities are.
Frequently Asked Questions
How Far in Advance Should I Start Packing My Kitchen?
Start packing your kitchen two to three weeks before moving day. Begin with items you rarely use, such as specialty appliances, serving dishes, and seasonal cookware.
Follow a packing timeline that keeps daily essentials accessible until the final few days. As you work, group similar items and label every box clearly.
Save organizing essentials, such as plates, utensils, cookware, coffee supplies, and cleaning products, for last. This way, you can prepare meals and clean comfortably.
Should I Hire Professional Movers to Pack Fragile Kitchen Items?
About 20% of moving damage involves fragile items, so you should consider professional movers if your kitchen includes heirlooms, crystal, or expensive appliances. Experts bring proper padding, sturdy boxes, and experience that reduces breakage.
However, you can save money by packing everyday dishes yourself. Add each task to your Moving checklist, and follow practical Packing tips: wrap individually, fill empty spaces, label boxes clearly, and keep valuables separate.
Get estimates before deciding.
What Kitchen Items Should I Avoid Moving Altogether?
Avoid moving hazardous, leaking, expired, or prohibited kitchen items altogether. Dispose of gasoline, propane canisters, lighter fluid, pesticides, bleach, and other flammables according to local rules.
Toss cracked cookware, damaged appliances, opened perishable foods, and anything contaminated. You can usually move sealed, nonperishable snacks safely, but donate them if space is limited.
Review specialty utensils individually. Replace cheap, worn, or rarely used pieces instead of paying to transport them.
How Can I Safely Transport Refrigerated and Frozen Foods?
Better safe than sorry: Keep refrigerated and frozen foods cold by packing them in insulated coolers with plenty of ice packs. For effective temperature control, keep perishables at or below 40°F and frozen items at 0°F.
Group similar foods together, seal leaks, and minimize opening the cooler. Use a refrigerator thermometer to monitor conditions.
For reliable food preservation, transport everything promptly, then discard items that smell unusual or have warmed considerably.
What Should I Do if Kitchen Items Are Damaged During the Move?
If kitchen items get damaged during the move, photograph everything immediately, save broken pieces, and notify the moving company in writing. Check your inventory and insurance policy before discarding anything.
You’ll usually need receipts, photos, and a description of the damage to file a claim. For future moves, follow Packing tips and Damage prevention practices: wrap fragile items individually, use sturdy boxes, cushion empty spaces, label boxes clearly, and avoid overloading cartons.
Conclusion
Packing your kitchen doesn’t have to feel overwhelming. Declutter first, wrap fragile items carefully, secure sharp tools, and seal liquids upright.
Label each box clearly, and keep daily essentials accessible. For example, imagine opening a labeled “Kitchen—First Night” box containing plates, mugs, utensils, coffee, and a pan. You’ll prepare dinner without unpacking everything.
With thoughtful sorting and protection, you’ll pack your kitchen safely and settle into your new home faster.