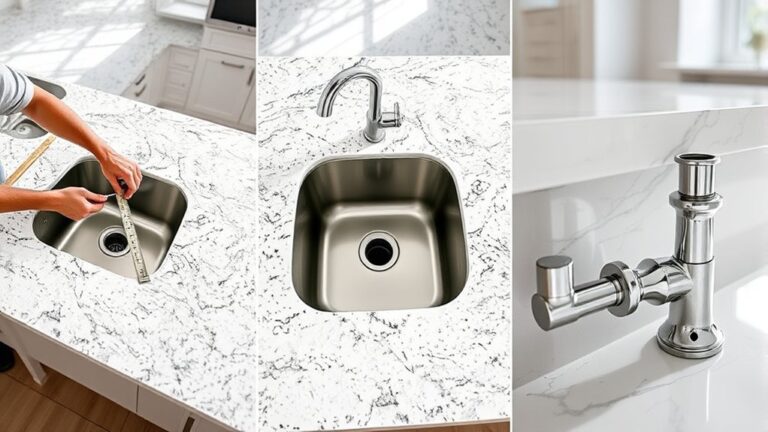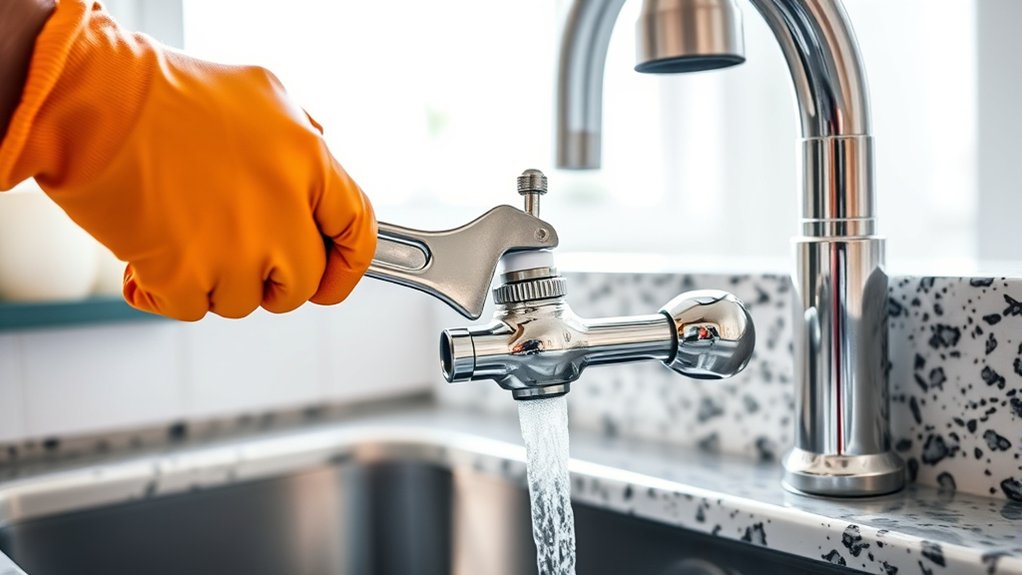
How to Remove a Kitchen Faucet in 10 Steps
Struggling with a stuck or outdated kitchen faucet? You’re not alone—many homeowners find faucet removal confusing, especially when tight fittings and hidden mounting hardware are involved. The right tools can make the job faster and help prevent leaks or cabinet damage.
To remove a kitchen faucet in 10 steps, gather a wrench, basin wrench, screwdriver, bucket, towels, and penetrating oil. Clear the cabinet and shut off both supply valves.
Open the faucet to release pressure. Disconnect the hot and cold lines, then loosen and remove the mounting nuts, bracket, and washers.
Lift out the faucet, clean the sink opening, and inspect the shutoff valves for leaks or corrosion.
For stubborn fittings or damaged valves, call a plumber for help with the remaining details.
Key Takeaways
- Gather a basin wrench, adjustable wrench, screwdriver, bucket, towels, penetrating oil, and flashlight.
- Clear the cabinet, shut off both supply valves, and open the faucet to release residual pressure.
- Disconnect the hot and cold supply lines, catching remaining water in a bucket.
- Loosen and remove mounting nuts, washers, brackets, and retaining plates beneath the sink.
- Lift out the faucet, clean the mounting surface, and inspect valves and connections for damage.
Gather Tools for Kitchen Faucet Removal

Before removing your kitchen faucet, gather an adjustable wrench, basin wrench, screwdriver, bucket, towels, penetrating oil, and a flashlight. This tools checklist gives you what you need for most faucet removal jobs.
Choose tools that fit the faucet’s nuts and connections. A basin wrench reaches tight spaces beneath the sink, while an adjustable wrench handles accessible fittings.
Keep the screwdriver nearby for mounting screws, clips, or decorative covers. Place the bucket under the plumbing area to catch residual water, and spread towels around it to protect the cabinet and floor.
Use the flashlight to illuminate dark corners and inspect fasteners clearly. If corrosion makes a nut difficult to turn, apply penetrating oil and let it work according to the label.
Wear gloves to protect your hands from sharp edges and grime. As practical maintenance tips, clean each tool before storage, check for damage, and replace worn jaws or slipping handles before your next repair.
Shut Off the Water Supply

Turn off both shutoff valves beneath the sink by turning each handle clockwise until it stops. Don’t force a valve that feels stuck; apply gentle, steady pressure, or use pliers carefully without damaging the handle.
Turn on the kitchen faucet and let the remaining water run until the flow stops. This releases water pressure in the supply lines and confirms that both valves have closed.
If water continues flowing, close the home’s main shutoff valve and check the individual valves again. Keep a small towel nearby to catch residual drips from the faucet or connections.
Work slowly so you don’t scratch the faucet finish with tools, jewelry, or loose hardware. If the valves are corroded, leaking, or impossible to turn, stop and arrange a plumber’s help before proceeding.
Don’t disconnect any supply line until you’ve verified that no water emerges when you open the faucet. Verify the handles remain fully closed throughout removal.
Clear the Cabinet Beneath the Sink
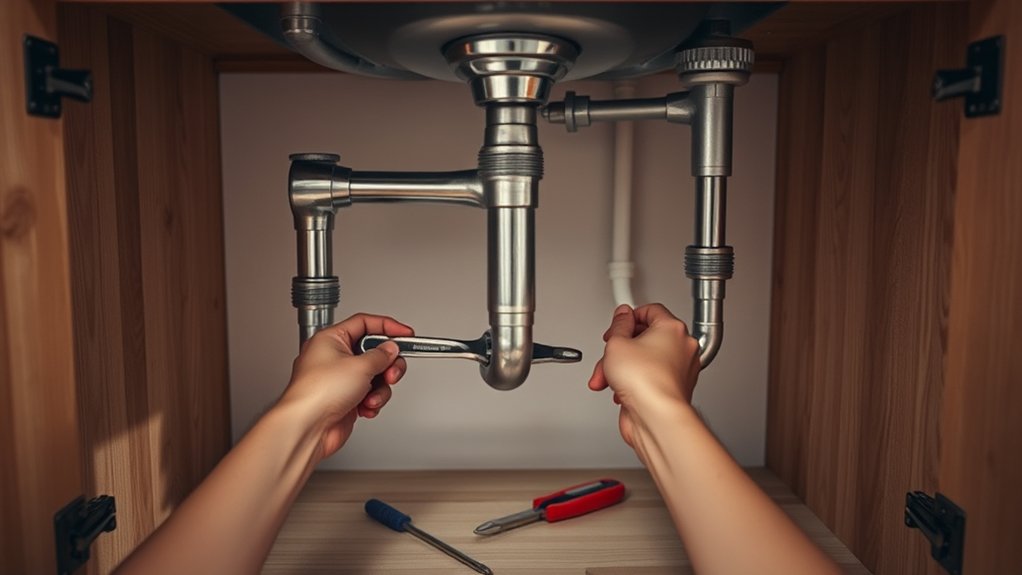
Clear out everything stored beneath the sink. This will give you more room to reach the faucet connections and tools. Keep the cabinet floor clear so you can work safely and efficiently.
Remove Stored Items
Start by removing all cleaning supplies, trash bins, and other stored items from the cabinet beneath the sink. Place everything on a nearby counter or floor space, keeping liquids upright to prevent spills.
Check each item for leaks, expired products, or damaged packaging before setting it aside.
Use this quick sorting system:
- Keep frequently used supplies together.
- Separate recyclable containers and disposable materials.
- Discard empty, leaking, or expired products safely.
Wipe dusty containers as you remove them, and group similar products so you can return them efficiently later.
Organizing essentials now also helps you identify unnecessary items and choose practical storage solutions for the cabinet.
Keep small bottles in a bin or tray, and store sharp tools separately from cleaners.
Don’t force crowded items into corners. Handle each object carefully while clearing the cabinet.
Improve Workspace Access
Once the cabinet is empty, clear the space beneath the sink completely so you can reach the faucet connections without obstruction. Remove the shelf if it blocks your shoulders, and place a towel beneath the pipes to catch drips. Use a flashlight or work light to brighten the cramped area.
Good workspace organization keeps tools visible and prevents you from bumping the drain or supply lines.
| Area | Action | Benefit |
|---|---|---|
| Cabinet floor | Add a towel | Catches water |
| Side walls | Move cleaners | Creates elbowroom |
| Faucet base | Aim a light | Reveals connections |
Position your body so you can kneel comfortably and keep both hands free. This ergonomic design approach reduces strain while you loosen nuts under the sink.
Keep a small container nearby for hardware, and leave the cabinet doors fully open. You’ll work faster and avoid losing parts in the dark.
Disconnect the Faucet Water Lines
Before disconnecting the faucet water lines, place a bucket beneath the connections to catch residual water. Shut off both supply valves by turning them clockwise. Open the faucet to release water pressure, then close it once the lines stop flowing. If a valve won’t turn, don’t force it; use a towel for grip or seek professional help.
Safely disconnect faucet water lines by shutting off valves, relieving pressure, and catching residual water with a bucket.
Gather these essentials:
- Adjustable wrench
- Small bucket
- Clean rag
Loosen the coupling nuts connecting the flexible supply lines to the shutoff valves. Turn each nut counterclockwise with your wrench while supporting the valve with your other hand.
Keep the bucket positioned beneath each connection because trapped water may spill. Remove the lines carefully, and cap or plug them temporarily if necessary to prevent drips.
Wipe the valve threads and surrounding area dry so you can inspect for corrosion or leaks. Proper faucet maintenance includes checking these connections before installation.
If you notice damaged hoses, cracked valves, or persistent water pressure, replace the faulty component or contact a plumber. Keep removed parts together for reference, but don’t remove the faucet’s mounting hardware yet.
Remove the Mounting Nuts and Bracket
Locate the mounting nuts beneath the sink, where the faucet connects to the countertop. Use a basin wrench or adjustable wrench to loosen and remove them. Then, carefully slide off the bracket while supporting the faucet so it doesn’t drop.
Locate Mounting Nuts
Reach beneath the sink and feel along the faucet shanks to find the mounting nuts securing the faucet to the countertop. You may find one nut on each shank, often hidden behind supply lines or the sink basin.
Use a flashlight to confirm their shapes and positions before choosing your tools.
- Hex nuts: Fit a basin wrench or adjustable wrench around their flats.
- Wing nuts: Turn them by hand if they aren’t overtightened.
- Locknuts: Use a deep socket when their recessed design limits access.
These mounting nut types can vary by faucet model, so don’t force a tool that slips.
Clear nearby items from the cabinet, then place a towel below the connections to catch drips.
Keep your selected tools for the nuts within reach, and identify the bracket’s location without disturbing it yet.
Remove Bracket Carefully
With the bracket identified, loosen each mounting nut using the tool that fits securely, turning counterclockwise while supporting the faucet from above. Keep your grip steady so the faucet doesn’t twist or fall into the sink.
Remove each nut, washer, and any remaining hardware, placing the pieces in a small container for reference during future faucet installation. If a nut resists, apply penetrating oil and wait several minutes rather than forcing it, which could damage the shank or countertop.
Once the hardware comes off, lower the bracket carefully and slide it away from the faucet tailpiece. Check for corrosion, mineral buildup, or hidden clips that might prevent removal.
With the bracket free, pull the faucet upward slowly. Inspect the connections, then confirm the water flow is fully shut off before disconnecting supply lines.
Free Corroded Faucet Parts Safely
If corrosion has seized the faucet parts, spray penetrating oil onto the threads and let it soak according to the product instructions. Open a window, wear gloves and eye protection, and keep flames away from the work area. Don’t force a stuck nut immediately; repeated light applications and patience can prevent damaged fittings.
- Tap the nut gently with a hammer to break the rust’s grip.
- Grip the fitting with one wrench while turning the nut with another.
- Apply controlled heat only if the manufacturer permits it, protecting nearby hoses and cabinetry.
Stop if the metal begins to deform, and replace severely damaged hardware rather than risking a sudden break. Check Faucet material compatibility before using solvents, heat, or tools on plated finishes, plastic connections, or soft brass.
Wipe away oil and loosened debris as you work. For Corrosion prevention, dry the area thoroughly and inspect exposed threads for pitting. Keep a fire extinguisher nearby when using heat, and never mix chemical products.
Avoid striking supply lines, valves, or the sink basin.
Lift Out the Old Kitchen Faucet
Disconnect the supply lines, and keep a towel underneath to catch any water left in the lines. Then, remove the mounting hardware beneath the sink and pull the old faucet free from the countertop.
Disconnect Supply Lines
Shut off the water supply, then open the faucet to relieve pressure in the lines. Place a bucket beneath the connections and keep a towel nearby to catch drips.
Before disconnecting anything, note which hose connects to hot and cold water. Your faucet finishing may hide connection points, so use a flashlight for a clear view.
- Loosen each compression nut with an adjustable wrench.
- Turn the nut counterclockwise while holding the valve steady.
- Remove the hose and let remaining water drain into the bucket.
Don’t force stuck fittings; apply penetrating oil and wait briefly. Inspect the hoses and valves for corrosion or leaks, replacing damaged supply lines before installing the new faucet.
Cap open valves temporarily to prevent accidental splashes. Keep the work area dry, and verify water pressure stays off before proceeding.
Remove Mounting Hardware
With the supply lines disconnected, reach beneath the sink and remove the nuts or brackets securing the faucet to the countertop. Use a basin wrench, adjustable wrench, or socket, depending on the fastener’s shape and available space.
Turn each nut counterclockwise, supporting the corresponding shank above so it doesn’t twist. If corrosion makes removal difficult, apply penetrating oil and wait several minutes before trying again.
Remove washers, plates, and other mounting hardware, keeping the pieces together in a container in case you need to identify the faucet’s installation method.
Check the countertop’s underside for clips, threaded rods, or a retaining plate that could still affect faucet stability. Once every fastener feels loose and no bracket remains engaged, inspect the opening and surrounding surface for sealant or debris.
Pull Faucet Free
Once all mounting hardware is removed, pull the faucet straight up through the countertop opening. If it resists, wiggle it gently rather than forcing it. Mineral buildup, old plumber’s putty, or a tight gasket may hold the base in place.
Use a plastic scraper to loosen residue without scratching the countertop. Before lifting completely, check that the supply lines and sprayer hose aren’t still connected below. Keep a towel nearby to catch trapped water.
- Support the faucet with both hands.
- Guide attached hoses through the opening.
- Set the old faucet on a towel.
Your Faucet design may determine whether the hose or weight catches beneath the sink, so work slowly. Don’t turn on the Water pressure to test anything while lines remain disconnected.
After removal, wipe the opening clean and inspect it for damage before installing the replacement.
Clean the Sink Mounting Surface
After removing the old faucet, clean the sink mounting surface to create a smooth, watertight base for the replacement. Remove loose putty, caulk, mineral deposits, and grime around each mounting hole.
Use a plastic scraper or old credit card to lift residue without scratching the sink. For stubborn buildup, apply a small amount of vinegar or a manufacturer-approved cleaner, then let it soften the deposit before wiping.
Avoid abrasive pads on stainless steel, porcelain, or composite surfaces because they can leave scratches. These cleaning techniques help you expose chips, corrosion, or uneven areas that could prevent a proper seal.
Wipe the area with a damp cloth, then remove cleaner residue with clean water. Dry the surface completely with a lint-free towel.
During surface preparation, run your finger around each opening to confirm it feels smooth and free of debris. Don’t install the replacement until the mounting area is clean, dry, and level.
This step helps prevent movement and leaks later.
Inspect Shutoff Valves for Leaks
Check both shutoff valves for leaks before installing the new faucet. Keep the cabinet area dry and well lit so you can spot moisture around each connection.
Turn each handle fully closed, then watch the valve, supply line, and threaded joint for several minutes. Use a dry paper towel for reliable leak detection. Even a small damp mark signals trouble.
- Check the valve body: Look for corrosion, mineral deposits, or drops forming around the stem.
- Inspect the connection: Wipe the nut and supply line, then check whether moisture returns.
- Test gradually: Open and close each valve slightly to confirm smooth operation without seepage.
If you find a leak, close the valve and dry the area before continuing. Don’t force a stiff handle, since excessive pressure can damage the valve.
Replace worn washers or tighten accessible connections only as needed, following the manufacturer’s guidance. Completing this valve maintenance now helps protect the cabinet and ensures a secure faucet installation.
Recheck both valves after connecting the new supply lines.
Know When to Call a Plumber
Call a plumber if a shutoff valve leaks, won’t close, or feels stuck, or if the faucet connections are corroded or difficult to access. A professional can prevent water damage and identify problems hidden beneath the sink.
Stop working immediately if you encounter a burst supply line, uncontrolled water flow, electrical wiring near standing water, or severe corrosion. These Plumbing emergencies require quick action. Turn off the home’s main water supply if you can do so safely, then contact a licensed plumber.
You should also get help if you can’t loosen a connection without force. Straining pipes or twisting a valve can cause a costly leak. Ask for Cost estimation before work begins, and confirm whether the quote includes parts, labor, disposal, and repairs to damaged plumbing.
If the faucet removal reveals cracked pipes, mold, or persistent dripping, don’t reinstall the faucet and hope the issue disappears. A plumber can repair the underlying problem and help you choose compatible replacement parts.
Frequently Asked Questions
How Long Does Removing a Kitchen Faucet Typically Take?
You’ll typically spend 30 to 60 minutes removing a kitchen faucet. If the connections are accessible and the faucet mounting hardware isn’t corroded, you may finish in about 20 minutes.
Tight spaces, mineral buildup, or stubborn nuts can extend the job to two hours. First, shut off the water supply, disconnect the lines, and loosen the mounting hardware beneath the sink.
Keep a towel nearby to catch residual water and prevent messes.
Can I Reuse My Old Faucet Hoses With a Replacement Faucet?
Sometimes, you can reuse your old faucet hoses, but it’s usually wiser not to carry old baggage into a new installation. Check the replacement faucet’s specifications first; fittings, length, and connection type must match exactly.
Your Faucet hose should show no cracks, corrosion, kinks, or damaged seals. Reuse considerations also include age and water-supply compatibility.
Because hoses are inexpensive, replacing them helps prevent leaks and protects your cabinets from hidden water damage.
What Should I Do With an Unwanted or Broken Kitchen Faucet?
You can recycle, donate, or safely discard an unwanted or broken kitchen faucet. Clean it first, remove attached hoses, and check your local recycling center’s metal-plumbing guidelines.
If it still works, donate it to a reuse center or list it for free. For broken fixtures, bag sharp pieces and follow municipal disposal rules.
Use these Cleaning tips and practice Faucet maintenance to keep your replacement working longer, preventing another premature replacement.
How Can I Choose a Compatible Replacement Kitchen Faucet?
Choosing a compatible replacement kitchen faucet can feel like finding a unicorn, but you can simplify it quickly. Measure your sink’s mounting holes and confirm the faucet mounting style—single-hole, centerset, or widespread.
Check cabinet clearance, supply-line connections, and spout reach. Match your household’s water flow needs with the faucet’s gallons-per-minute rating and local regulations.
Also verify the finish, sprayer type, and included accessories before purchasing so installation won’t surprise you later.
Should I Replace the Faucet Aerator During Installation?
Yes, you should consider replacing the faucet aerator during installation, especially if the existing one shows mineral buildup, corrosion, or damage.
A new faucet aerator can improve water flow, reduce splashing, and help maintain consistent pressure. Choose an aerator that matches your replacement faucet’s thread size and flow rating.
If the old aerator looks clean and fits properly, you can reuse it. Replacing it, however, offers inexpensive peace of mind.
Conclusion
With the water off and the mounting hardware removed, you can lift out your old kitchen faucet and clean the sink deck for its replacement. Take your time checking the supply lines and shutoff valves, since small leaks can become costly problems.
Think of it like changing a tire: the job is simple when you have the right tools, but rushing can leave you stranded. If a valve won’t close or a connection looks damaged, call a plumber before completing the kitchen faucet removal.