How to Clean Kitchen Cabinets in 5 Easy Steps
Greasy fingerprints, stubborn splatters, and dull finishes can make even a tidy kitchen feel neglected. You’re not alone—many people struggle to find cabinet cleaners that remove grime without damaging the surface.
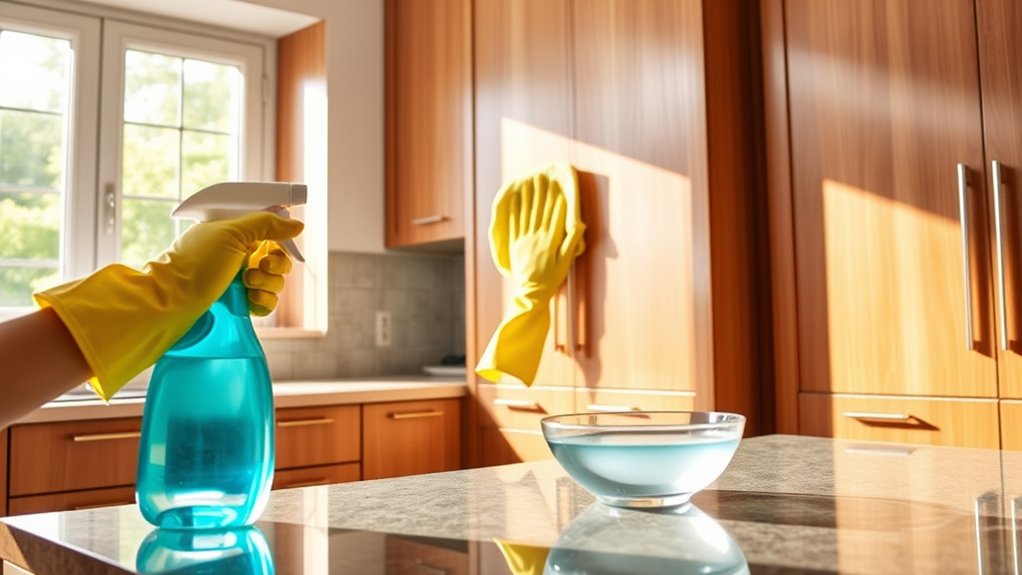
In this guide to the best kitchen cabinet cleaners, we’ll cover how to clean kitchen cabinets in 5 easy steps. Start by gathering soft cloths, dish soap, and a spray bottle. Empty your cabinets and dust away loose debris.
Mix a gentle degreasing solution suited to your cabinet material, then scrub grime with a soft-bristled brush, paying attention to corners and hardware.
Finally, rinse, dry, and polish for a streak-free shine. Keep going to uncover the details behind each step.
Key Takeaways
- Gather supplies: microfiber cloths, mild dish soap, warm water, soft brush, and a spray bottle for solutions.
- Empty cabinets, discard unused items, and dust shelves, corners, and frames thoroughly before cleaning.
- Mix a gentle solution, such as soap and water or vinegar, based on the cabinet material for effective degreasing.
- Scrub cabinets section by section, focusing on grease, grime, hinges, and hardware with a brush.
- Rinse with a damp cloth, dry thoroughly, then polish surfaces and hardware for a streak-free shine.
Gather Supplies to Clean Kitchen Cabinets

Before you start scrubbing, gather a few basic supplies: a soft microfiber cloth, warm water, a mild dish soap, and a soft-bristled brush for tackling grime in corners and grooves. You’ll also want a spray bottle to mix your cleaning solution and apply it evenly without soaking the wood.
If you’re cleaning cabinet hardware, add an old toothbrush to your supply list. It’s perfect for reaching into tight spaces around knobs and handles where dust and grease build up. Keep a separate dry cloth on hand for buffing surfaces after washing, preventing streaks or water spots.
Don’t forget supplies for the interior shelves, too. You’ll need a vacuum or small broom to remove crumbs and debris before wiping them down. Shelf liner can also come in handy if you’re replacing old, stained liners after cleaning.
Lay everything out before you begin so you’re not searching for items mid-task. Having supplies ready keeps the process efficient and mess-free.
Clear Clutter and Dust Your Cabinets

Once you’ve gathered your supplies, empty your cabinets completely so you can see exactly what you’re working with. Pull out every dish, pot, and pan, along with any cabinet accessories like organizers, racks, or liners that may be installed. This gives you full access to every corner and shelf.
While your cabinets are empty, take this chance to sort through items you no longer use. Donate or toss anything that’s expired, broken, or simply taking up space. This decluttering step makes future cleaning sessions faster and keeps your kitchen functioning efficiently.
Next, grab a dry microfiber cloth or a duster and remove loose dust, crumbs, and debris from shelves, corners, and door frames. Pay attention to the cabinet materials you’re working with, since wood, laminate, and painted surfaces each collect dust differently. Thorough dusting now prevents grime from mixing with cleaning solutions later, making the actual washing process much more effective.
Mix a Gentle Degreasing Solution

Since kitchen cabinets collect grease from cooking splatters and handling, you’ll want a solution strong enough to cut through grime but gentle enough to protect your cabinet’s finish. Mix warm water with a few drops of dish soap in a bucket, or combine equal parts water and white vinegar for a natural alternative.
For tougher buildup, add a tablespoon of baking soda to create a mild abrasive paste.
Your cabinet materials determine which solution works best. Wood cabinets need gentler formulas since harsh chemicals strip finishes and cause discoloration.
Laminate and painted surfaces tolerate vinegar solutions well, while glossy finishes respond better to plain soap and water.
Consider your cleaning frequency when choosing ingredients, too. If you wipe cabinets weekly, a light soap solution keeps grease from building up.
For deep cleans done less often, a stronger vinegar mix tackles accumulated residue effectively. Always test your solution on an inconspicuous spot first.
Scrub Your Kitchen Cabinets Clean
With your cleaning solution mixed and ready, grab a soft-bristled brush or microfiber cloth to start working it into the cabinet surfaces. Scrub in small, circular motions, focusing on areas with visible grime, grease splatters, or sticky residue. Pay close attention to corners and detailed molding where dirt tends to collect.
Don’t forget the cabinet hinges. Grease and dust often build up around these small, functional parts. Use an old toothbrush to reach tight spots and remove buildup without scratching the metal.
If your cabinets have shelf liners, pull them out and wipe down the shelves underneath before cleaning the liners separately. Depending on their material, you can wash them with warm, soapy water or replace them if they’re too worn out.
Work methodically, section by section, so you don’t miss any spots. Once you’ve scrubbed every surface, you’re ready to move on to rinsing and drying your cabinets.
Rinse and Polish for a Streak-Free Shine
After you’ve scrubbed away the grime, wipe down every surface with a clean, damp cloth to remove any leftover cleaning solution. Rinse the cloth frequently so you’re not just spreading residue around. Dry each cabinet with a soft microfiber towel to prevent water spots and streaks from forming as the wood air-dries.
Don’t forget your cabinet hardware. Handles and knobs collect grease and fingerprints just as much as the doors. Buff these pieces separately for a polished look that matches the rest of your kitchen.
Picture these finishing techniques in action:
- A soft cloth gliding across wood grain, pulling up the last traces of dust.
- Light catching a knob’s surface, free of smudges and fingerprints.
- Cabinet doors reflecting a soft glow, with zero streaks in sight.
Finish with a cabinet-safe polish if you want extra shine. Apply a small amount, work it in circular motions, then buff until your cabinets gleam like new.
Frequently Asked Questions
How Often Should I Deep Clean My Kitchen Cabinets Each Year?
You should deep clean your kitchen cabinets about two to four times a year, depending on your cabinet material and how often you cook. Wood cabinets often need gentler, less frequent cleaning, while laminate or painted surfaces can handle more frequent scrubbing.
If you’re cooking daily, bump up your cleaning frequency to avoid grease buildup. Otherwise, a seasonal deep clean keeps your cabinets looking fresh without damaging their finish.
Can I Use This Method on Painted or Laminate Cabinets Safely?
Yes, you can use this method safely. Painted finishes and laminate surfaces both respond well to gentle, non-abrasive cleaners, as long as you avoid harsh scrubbing or excessive water.
Wipe with a soft cloth, use mild soap, and dry surfaces promptly. Skip abrasive pads or strong chemicals, since they can dull painted finishes or peel laminate surfaces over time. Stick to gentle care, and your cabinets will stay looking great.
What Should I Do if Cabinets Have Stubborn, Sticky Grease Buildup?
For stubborn, sticky grease buildup, mix warm water with a few drops of dish soap or add a splash of vinegar for extra grease removal power. Apply the solution with a soft cloth, letting it sit for a minute or two to break down stubborn residue.
Then wipe gently in circular motions, rinsing your cloth often. For tougher spots, a baking soda paste works wonders. Just don’t scrub too hard on painted or laminate surfaces.
Are Natural Cleaning Solutions as Effective as Store-Bought Degreasers?
Yes, natural solutions can work surprisingly well—studies show vinegar kills up to 99% of bacteria, rivaling many commercial products.
You’ll find eco friendly alternatives like baking soda paste or vinegar-water mixes cut through grease effectively without harsh fumes.
While chemical effectiveness in store-bought degreasers sometimes tackles tougher buildup faster, you don’t need to sacrifice safety for results.
Try natural options first—you’ll likely be impressed, and your cabinets (and lungs) will thank you!
How Do I Clean Cabinet Hardware Like Knobs and Handles?
Remove knobs and handles when possible, then soak them in warm, soapy water for about 10 minutes. Scrub with an old toothbrush to loosen grime from detailed edges, especially on drawer pulls with grooves.
Wipe door hinges with a damp cloth, using a cotton swab for tight corners. Dry everything thoroughly before reattaching.
If hardware’s extra grimy, you can use a vinegar solution, but avoid soaking any pieces with antique or delicate finishes.
Conclusion
Think of your kitchen cabinets as the canvas of your home’s heart. With each wipe, you’re not just clearing grease—you’re brushing away the fingerprints of hurried mornings and adding a fresh glow that reflects a clean start.
Step back and admire your work: those gleaming doors now reflect more than light—they reflect the care you’ve poured in. You’ve turned clutter into clarity, grime into shine, and your kitchen into a sanctuary.
With these kitchen cabinet cleaning steps, you can keep your space fresh, polished, and welcoming.