How to Replace a Kitchen Faucet in 10 Steps
Replacing a kitchen faucet can feel more complicated than it should, especially when dealing with tight connections, leaks, or confusing instructions. You’re not alone—many people struggle to choose the right faucet and install it with confidence.
This guide explains how to replace a kitchen faucet in 10 steps. You’ll learn how to prepare your sink, remove the old fixture, install the new one, and check for leaks.
To replace a kitchen faucet, check compatibility and gather tools. Shut off hot and cold valves, then open the faucet to release pressure. Disconnect the old supply lines and remove mounting hardware. Lift out the old faucet, then clean and inspect the sink deck.
Position the gasket and new faucet, and secure it from below. Connect hot and cold lines, attach the spray hose, restore water slowly, and check for leaks. Follow the detailed steps below for a smoother installation.
Key Takeaways
- Gather the correct faucet, tools, replacement parts, and confirm compatibility with your sink’s holes, clearance, and supply connections.
- Shut off hot and cold valves, relieve pressure by opening the faucet, and protect the cabinet with towels and a bucket.
- Disconnect supply lines and mounting hardware, remove the old faucet, and thoroughly clean and inspect the sink deck.
- Position the gasket or deck plate, center the new faucet, then secure its mounting hardware without overtightening.
- Connect hot, cold, and spray lines, open valves slowly, test operation and leaks, then clean and dry the installation.
Check Faucet Compatibility and Gather Tools

Before you begin, confirm that the replacement faucet matches your sink’s mounting configuration and the available space beneath it. Count the sink’s mounting holes, measure their spacing, and check whether you need a deck plate for unused openings. Compare the faucet’s height, spout reach, and handle clearance with your backsplash and cabinet layout.
Review the specifications for Faucet material, since stainless steel, brass, and composite finishes differ in durability, maintenance, and appearance. Verify Brand compatibility if you’re replacing parts, adding a soap dispenser, or connecting an existing filtration system. Check the manufacturer’s dimensions and connection requirements before you buy.
Gather an adjustable wrench, basin wrench, plumber’s tape, bucket, flashlight, towels, screwdrivers, and a utility knife. Keep the installation instructions nearby, and include replacement supply lines, mounting hardware, and a new gasket if the package doesn’t provide them. Organize every tool within reach so you won’t need to interrupt the installation.
Shut Off the Water Supply

Turn off the hot- and cold-water supply valves beneath the sink by turning each handle clockwise until it stops. If either valve feels stuck, don’t force it; use a cloth for grip and turn gently. Older valves may need replacement, so avoid damaging them while preparing your workspace.
Open the faucet briefly to release trapped water pressure in the fixture and confirm that no water flows. Close the faucet afterward to keep the area dry.
Place a shallow pan or towels beneath the valves to catch residual water, and keep a flashlight nearby if the cabinet is dark.
Check both valves carefully for drips. If water continues flowing, shut off the home’s main supply before proceeding.
Protect the cabinet from moisture, and remove cleaning products or other items that could interfere with your work. Identify the faucet material and surrounding surfaces so you can choose suitable gloves and avoid scratches during the replacement.
Disconnect the Old Water Lines
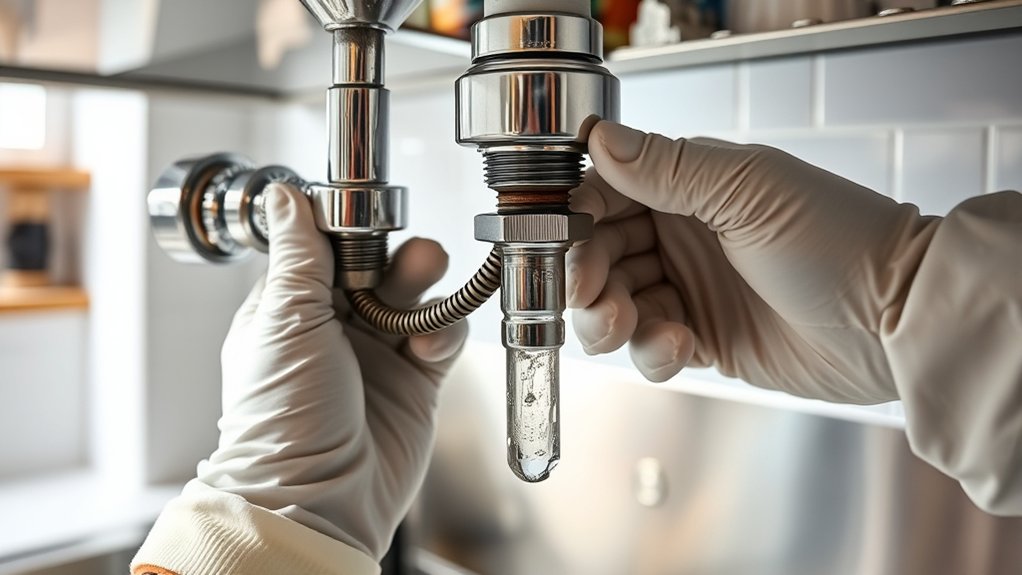
With the water supply shut off, loosen the hot- and cold-water connection nuts at the faucet using an adjustable wrench. Hold each valve or supply tube with your other hand so you don’t twist the plumbing beneath the sink. If a nut resists, apply penetrating oil and wait several minutes; don’t force it, since excessive pressure can damage a valve or fitting.
Place a bucket and towel under the connections to catch trapped water. Even after you close the valves, residual Water pressure may release a small stream when you separate the lines.
Loosen each nut slowly, then finish removing it by hand. Keep the hot and cold lines separate, and label them if their positions aren’t obvious.
Inspect the fittings for corrosion, mineral buildup, or cracks. Note the existing Faucet materials, such as braided stainless steel, copper, or plastic, so you can choose compatible replacements.
Cap or plug the open valves temporarily to prevent drips while you continue.
Remove the Old Kitchen Faucet
Before removing the old faucet, shut off the water supply beneath the sink. Then, open the faucet to release any remaining pressure and disconnect the hot- and cold-water supply lines. Keep a bucket nearby to catch any residual water.
Shut Off Water Supply
Start by shutting off the hot- and cold-water supply valves beneath the sink, then open the faucet to relieve any remaining pressure. Confirm that both valves are fully closed before you continue.
Water pressure should drop to zero, but wait a moment and watch the spout for drips. If water continues flowing, close the home’s main shutoff valve and test the faucet again.
Protect the cabinet floor with a towel, and keep a bucket nearby for residual water.
- Turn the hot-water valve clockwise until it stops.
- Turn the cold-water valve clockwise until it stops.
- Open and close the faucet handles to verify the supply is off.
Use a flashlight to inspect each valve for leaks or corrosion. Don’t force a stuck valve; call a plumber if necessary.
Identify your faucet finishes before handling the fixture, since abrasive tools can scratch them.
Disconnect Supply Lines
Once the water is off, disconnect the hot- and cold-water supply lines from the faucet using an adjustable wrench. Place a bucket beneath the connections to catch residual water, then loosen each compression nut slowly.
If the fittings resist, hold the faucet’s threaded shank or valve steady with another wrench to prevent twisting the supply pipes. Don’t force corroded connections. Apply penetrating oil and wait several minutes before trying again.
Check for remaining water pressure by opening the faucet handles, and let the lines drain completely. Label the hot and cold lines if you’ll reuse them.
Inspect each hose for cracks, mineral buildup, or damaged threads, and replace questionable parts. Protect your sink’s surface and surrounding faucet finishes with a towel while you work.
Once disconnected, remove the mounting hardware beneath the sink.
Clean and Inspect the Sink Deck
Clean the sink deck and scrape away all the old plumber’s putty. Then, inspect the surface for cracks, corrosion, or any other damage that could prevent a proper seal. Repair any issues before installing the new faucet.
Remove Old Plumber’s Putty
With the old faucet removed, scrape away the plumber’s putty from the sink deck using a plastic putty knife. Work around each opening, keeping the blade nearly flat so you don’t gouge the surface.
Gather loosened material as you go instead of pushing it into the cabinet or drain.
For effective Plumber’s putty and Sealant removal:
- Soften stubborn residue with a warm, damp cloth for several minutes.
- Lift remaining beads with a plastic scraper or an old credit card.
- Wipe the deck with mild dish soap and water, then dry it completely.
Use a nylon brush or cotton swab to clear residue from the faucet holes. Avoid metal blades, abrasive pads, and harsh solvents, which can scratch finishes or leave chemical residue.
Bag the removed putty before installing the replacement faucet.
Inspect for Damage
Inspect the sink deck for cracks, chips, corrosion, or stains around the faucet openings. Wipe away remaining putty, mineral deposits, and grime with a mild cleaner and a nonabrasive sponge. Dry the surface completely so you can see small defects clearly.
Run your fingers around each opening to detect raised edges, pits, or weak spots. Check beneath the deck, too, using a flashlight, and look for leaks, rust, or water damage.
Include a corrosion assessment, especially on stainless steel, cast iron, or older fixtures. If you find a crack, severe pitting, or a warped mounting area, repair or replace the sink before installing the new faucet.
Confirm material compatibility between the sink, faucet, gasket, and mounting hardware. A clean, sound deck helps the faucet seal securely and remain stable.
Position the Gasket or Deck Plate
Place the rubber gasket over the faucet’s mounting holes, aligning each opening carefully. Verify that it sits flat against the sink surface, with no folds, twists, or debris underneath.
Place the gasket flat over the mounting holes, ensuring proper alignment and a clean, even seal against the sink surface.
Proper gasket placement creates a reliable seal and helps prevent water from reaching the cabinet below. If your faucet includes a separate deck plate, place it over the sink’s existing holes before setting the gasket or faucet, according to the manufacturer’s diagram.
Check these details before continuing:
- Center the gasket or deck plate over the holes, keeping its front edge parallel with the sink’s rim.
- Match the plate’s holes to the faucet openings without forcing or shifting the piece.
- Wipe away grime, old sealant, or moisture so the surfaces meet evenly.
For a three-hole sink, ensure the deck plate fully covers unused openings. For a single-hole installation, don’t add a plate unless the faucet requires one.
Inspect the arrangement from above and below the sink. Keep the pieces aligned while you prepare for the next step.
Mount and Secure the New Faucet
Set the faucet base onto the gasket or deck plate, making sure it’s aligned with the sink. Then, from beneath the sink, thread on the mounting hardware by hand. Finally, tighten everything securely with a basin wrench, but be careful not to overtighten and damage the sink.
Position the Faucet Base
Position the faucet base over the sink’s mounting hole, aligning it with the sink’s curve and ensuring the gasket sits flat beneath it. Check that the base sits evenly without rocking or leaving gaps around the opening.
If your faucet includes a separate escutcheon plate, place it beneath the base according to the manufacturer’s instructions. Before securing anything, confirm these points:
- The faucet color complements the sink and surrounding fixtures.
- The faucet style matches your kitchen’s design and offers the reach you need.
- The spout points toward the center of the basin, while the handle has comfortable clearance.
Look beneath the sink to verify that the threaded shank passes cleanly through the mounting hole. Keep the faucet centered as you prepare the included mounting components, and wipe away debris that could prevent a level, stable fit. Don’t force misaligned parts.
Tighten Mounting Hardware
With the faucet centered and the shank passing cleanly through the sink, slide the rubber gasket, metal washer, and mounting nut onto the shank from beneath the countertop, following the manufacturer’s order.
Hand-tighten the nut while holding the faucet straight. Then use a basin wrench or supplied tool to snug the mounting hardware.
Don’t overtighten; excessive force can crack the sink or distort the seal.
| Check | What you want |
|---|---|
| Faucet base | Flush against the sink |
| Gasket | Evenly compressed |
| Mounting nut | Firm, not forced |
Ask someone to steady the faucet above while you work below, especially with tightening bolts or paired mounting brackets.
Turn the handle and spout to confirm they move freely. Wipe away squeezed-out sealant, then inspect beneath the sink for gaps.
If the faucet shifts, loosen the nut, recenter it, and tighten again gradually.
Connect the Hot and Cold Lines
Connect the faucet’s hot and cold supply lines to the matching shutoff valves, tightening each connection by hand before securing it with an adjustable wrench. Keep the Hot water line on the left and the Cold supply line on the right, unless your faucet or plumbing uses different markings.
Don’t cross the lines, kink the flexible tubes, or force a misaligned fitting.
- Inspect each washer or gasket, ensuring it sits flat inside the connector before you attach it.
- Hold the shutoff valve steady with one wrench while you tighten the supply-line nut with another. Turn only until snug; overtightening can damage the threads or gasket.
- Open both shutoff valves slowly, then check every connection for drips. Wipe the joints dry and watch them for a minute.
If you spot a leak, close the valve, loosen the nut, reseat the gasket, and reconnect it carefully.
Once the lines remain dry, run the faucet briefly and confirm steady flow from both sides.
Connect the Spray Hose if Included
If your faucet includes a pull-down or side sprayer, attach its hose to the faucet’s underside or diverter fitting, making sure the gasket is seated and the connection is secure.
Identify the correct Spray hose before connecting it. Pull-down models typically route the hose through the faucet body, while side sprayers connect beneath the sink.
Identify the spray hose and route it correctly: through the faucet body for pull-down models or beneath the sink for side sprayers.
Match the hose end to the faucet’s Connection fittings, then push or thread it into place according to the manufacturer’s instructions.
If the fitting uses a quick-connect collar, press the hose firmly into the port until the collar locks.
For threaded fittings, hand-tighten the connection, then give it a slight additional turn with pliers if necessary. Don’t overtighten, or you could damage the threads or gasket.
Secure any included weight to the hose below the sink, positioning it where it can move freely without striking plumbing, cabinet walls, or cleaning supplies.
Keep the hose aligned and untwisted so the sprayer can extend smoothly.
Restore Water and Test for Leaks
Once the spray hose is secured, turn on the water supply valves slowly, opening the cold and hot valves fully. Keep a towel beneath the connections as pressure returns, then inspect each joint, the faucet base, and the spray-hose fitting.
If you see moisture, shut off the valves, relieve pressure by opening the faucet, and tighten the connection slightly. Don’t overtighten, because you could damage the threads or washer.
- Run cold water for 30 seconds, then switch to hot water and check both supply lines.
- Pull out and retract the sprayer several times, confirming smooth movement and dry connections.
- Close the faucet and watch underneath for several minutes. Wipe every fitting first so new drips stand out.
Test the handle, spout, and sprayer for proper flow. Remove debris from the aerator if water splutters.
Finally, wipe the sink and faucet dry to protect faucet aesthetics, and dispose of packaging responsibly. A leak-free installation supports Water conservation by preventing waste and cabinet damage.
Frequently Asked Questions
How Long Does a Typical Kitchen Faucet Replacement Take?
A typical kitchen faucet replacement takes about one to two hours. You’ll finish faster if the shutoff valves work properly and the connections remain accessible.
During Faucet installation, you’ll disconnect the supply lines, remove the old fixture, clean the sink surface, secure the new faucet, and check for leaks. Basic Plumbing tools, including an adjustable wrench, basin wrench, and screwdriver, usually suffice.
Older plumbing or rusted parts can extend the project.
Can I Replace a Faucet Without Professional Plumbing Experience?
Yes, you can replace a faucet without professional plumbing experience. Measure twice, cut once: gather an adjustable wrench, basin wrench, plumber’s tape, and a bucket before you start. Turn off the water, disconnect the supply lines, remove the old faucet, and install the new one according to its instructions.
DIY plumbing can save money, but stop if connections leak or corrode. Good faucet maintenance includes tightening loose fittings and checking seals regularly for drips.
What Faucet Styles Best Suit Different Kitchen Sink Designs?
Match your faucet style to your sink’s layout and proportions. Choose a single-handle, pull-down faucet for most modern, single-basin sinks; it saves space and simplifies washing.
Pick a bridge or widespread faucet for farmhouse and double-basin sinks, especially with three mounting holes. A wall-mount faucet suits deep, exposed-front sinks.
Consider Faucet material, such as stainless steel or brass, for durability, and select Handle design based on your available clearance.
How Often Should Kitchen Faucets Be Replaced?
You should typically replace your kitchen faucet every 15–20 years, but don’t wait if you notice persistent leaks, rust, low water pressure, or difficult operation. Frequent repairs can signal that replacement costs less over time.
Practice regular Faucet maintenance by cleaning aerators, checking connections, and addressing drips promptly. Replacing an outdated, inefficient model can improve Water conservation, reduce utility bills, and give you more reliable daily performance.
What Should I Do if My New Faucet Has Low Water Pressure?
When your new faucet has low water pressure, remember, “An ounce of prevention is worth a pound of cure.” Check whether the aerator contains debris, then unscrew and rinse it thoroughly.
Confirm that both supply valves are fully open and that the hoses aren’t kinked. Compare hot and cold flow to identify water pressure issues.
These troubleshooting tips can help: inspect the cartridge, flush the lines, and contact the manufacturer if problems persist.
Conclusion
Replacing a kitchen faucet doesn’t have to be a mountain to climb. Once you’ve checked compatibility, shut off the water, removed the old fixture, and connected the new lines, turn the supply back on slowly.
Test both temperatures, the sprayer, and every connection for leaks. Tighten fittings gently if needed. With these steps complete, you’ll enjoy a reliable kitchen faucet upgrade and greater confidence in your kitchen, proving that small improvements can make a big difference.