How to Sharpen Kitchen Shears in 7 Steps
Dull kitchen shears can turn simple prep into a frustrating chore, especially when they snag or crush instead of cutting cleanly. You’re not alone: many people struggle to keep their shears sharp. This guide to how to sharpen kitchen shears walks you through seven simple steps to restore a smoother cut.
To sharpen your kitchen shears in 7 steps, first gather your sharpening stone, honing rod, screwdriver, cloth, and gloves.
Clean and disassemble the shears by removing the pivot screw.
Sharpen each blade at about a 20° angle using smooth strokes, then hone the edges for smoothness.
Reassemble, test by cutting, and clean thoroughly.
Finally, lubricate the pivot to keep them working smoothly.
With these basics down, you’ll be ready to improve every cut with ease.
Key Takeaways
- Disassemble kitchen shears by removing the pivot screw to separate the blades for easier sharpening.
- Use a sharpening stone or diamond file at a 20° angle with consistent, controlled strokes on both blades.
- Keep the sharpening stone wet to reduce friction and prevent blade damage during the sharpening process.
- Hone the blades with a honing rod after sharpening to smooth edges and enhance sharpness.
- Clean, dry, lubricate, and reassemble the shears, then test sharpness by cutting paper or herbs.
Why and When to Sharpen Kitchen Shears

Although kitchen shears are built to handle tough tasks, you’ll need to sharpen them regularly to maintain their cutting efficiency. Over time, frequent use in various cooking techniques dulls the blades, making it harder to cut through meats, herbs, and packaging. Dull shears can slow you down and even become unsafe, requiring more force and increasing the risk of slips.
Regular kitchen maintenance includes checking your shears for sharpness. If you notice they struggle with tasks they once handled easily, it’s time to sharpen them. Keeping your shears sharp ensures precision and safety, enhancing your overall cooking experience.
Whether you’re chopping vegetables or trimming poultry, sharp blades improve performance and reduce effort. Incorporate sharpening into your routine kitchen maintenance schedule to keep your shears in top shape and your cooking techniques efficient and enjoyable.
Tools Needed to Sharpen Kitchen Shears
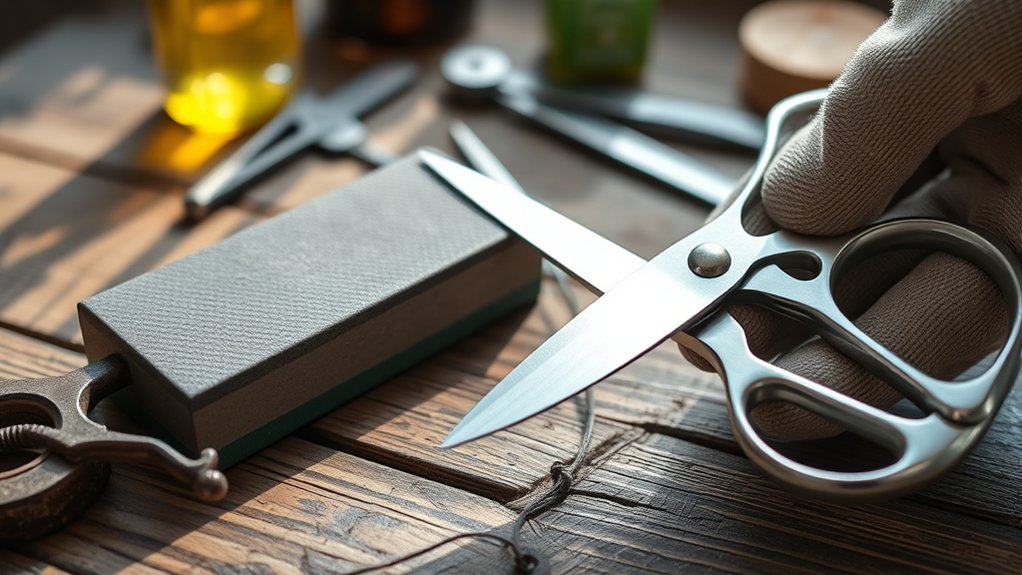
Before you start sharpening your kitchen shears, gather the right tools to guarantee a smooth and effective process. You’ll need a sharpening stone or a diamond file, both great for restoring the blades’ edge.
A honing rod can help maintain sharpness between full sharpenings. Don’t forget a cloth or towel to clean the blades afterward, ensuring no metal particles linger that could affect your cooking techniques.
Furthermore, having a pair of gloves protects your hands during the process, while a screwdriver might come in handy if your shears have removable screws. Keeping these tools ready supports efficient kitchen maintenance and extends your shears’ life.
How to Disassemble Kitchen Shears for Sharpening
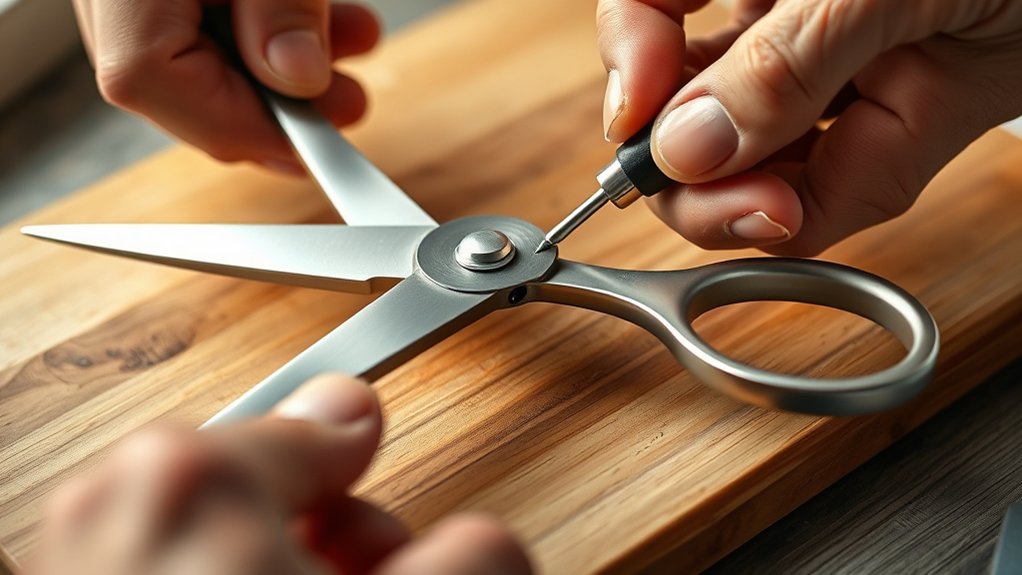
Before sharpening your kitchen shears, take a moment to identify their parts. Find the central pivot that connects the two blades. If it’s designed to come apart, carefully remove the pivot to separate the blades and make sharpening easier.
Identifying Shear Components
How do you identify the key parts of your kitchen shears to prepare for sharpening? First, familiarize yourself with the common shear component types: blades, handles, and the central pivot.
Blades can vary based on blade material differences, such as stainless steel, carbon steel, or ceramic. Knowing the blade material helps you choose the right sharpening method.
Handles may be plastic, metal, or rubber-coated, but they don’t affect sharpening directly. Focus on the blades—they’re the cutting edges you’ll sharpen.
Examine how the blades connect at the pivot point, ensuring you understand their alignment before disassembly. Recognizing these components and their materials will make your sharpening process more effective and help maintain your kitchen shears’ performance for longer.
Removing the Central Pivot
Since the central pivot holds the blades together, removing it is essential to access each blade for thorough sharpening. To start pivot removal, locate the screw or bolt at the center where the blades meet.
Use a screwdriver or appropriate tool to carefully unscrew it, keeping track of small parts. Once removed, gently separate the blades to work on each edge independently.
Be mindful of blade alignment when reassembling; improper alignment can affect cutting performance. After sharpening, reinsert the pivot and tighten it just enough to allow smooth blade movement without wobbling.
Taking care during pivot removal and reassembly ensures your kitchen shears stay sharp and function properly for years.
When you want a precise edge on your kitchen shears, using a sharpening stone is one of the most effective methods. First, choose a sharpening stone with a grit suitable for your shears—coarse for dull blades, fine for regular knife maintenance.
After removing the central pivot, hold the blade at a 20-degree angle against the stone. Use smooth, controlled strokes, moving the blade away from you, mimicking natural cutting techniques. Consistency is key; sharpen each side evenly to maintain the blade’s balance.
Keep the sharpening stone wet during the process to reduce heat and friction, which can damage the blade. After sharpening, wipe the blades clean and reassemble the shears.
This method restores a sharp edge, improving cutting efficiency and safety. Regularly sharpening your kitchen shears with a stone not only enhances their performance but also extends their lifespan, making your cutting tasks easier and more precise.
Hone Kitchen Shears Blades for a Smooth Edge
Although sharpening restores the blade’s edge, honing is vital to smooth out any roughness and refine the cutting surface. After sharpening, use a honing rod or fine honing stone to gently run along each blade at the original bevel angle. This removes any tiny burrs left behind and polishes the edge, making your kitchen shears cut cleaner and safer. Take your time and maintain consistent pressure to avoid altering the blade’s shape.
Honing also plays a role in cooking safety by reducing the risk of uneven cuts that could cause slips or accidents. Once honed, wipe the blades clean to remove metal particles. Proper shears storage is essential too: store them in a protective sheath or designated drawer to prevent dulling and maintain the honed edge longer. By honing regularly and storing your kitchen shears properly, you keep them sharp, safe, and ready for all your cooking tasks.
Reassemble and Test the Sharpness of Your Shears
Now that the blades are honed, carefully realign and reassemble your kitchen shears so they move smoothly. Then test their sharpness by cutting a piece of paper or fabric. If they cut cleanly and effortlessly, they’re ready to use.
Properly Align Shear Blades
Before you finish, make certain the blades of your kitchen shears are properly aligned to ensure smooth cutting. Blade alignment is essential; misaligned blades can cause uneven cuts and damage your shears. After sharpening, reassemble the shears carefully, ensuring the pivot screw is snug but not too tight. This balance allows the blades to move freely while maintaining proper contact.
Perform shear calibration by opening and closing the shears several times, checking that the blades meet evenly along their entire edge. If you notice any gaps or misalignment, adjust the pivot screw slightly until the blades sit flush. Proper blade alignment not only improves cutting performance but also extends the life of your kitchen shears, making your sharpening efforts truly worthwhile.
Conduct Sharpness Test
Once you’ve reassembled your kitchen shears, it’s essential to test their sharpness to guarantee they cut efficiently. Sharp shears improve your cooking techniques and maintain kitchen safety by reducing slips and accidents. Follow these steps to conduct a sharpness test:
- Cut through a piece of paper—smooth, effortless cuts mean sharp blades.
- Try snipping a piece of fabric; dull shears will drag or snag.
- Test on a kitchen ingredient, like fresh herbs or thin vegetables.
- Check for even blade alignment and no wobbling during cuts.
If your shears struggle with these tasks, sharpen them again. Keeping your shears sharp ensures you work safely and efficiently, enhancing your cooking experience every time.
Clean and Lubricate Kitchen Shears for Best Performance
Although sharpening your kitchen shears is essential, cleaning and lubricating them guarantees they perform smoothly and last longer. Start by disassembling your shears if possible, then soak the blades in warm, soapy water. Use a soft brush to remove food particles or rust, applying gentle cleaning techniques to avoid damaging the blades. Rinse thoroughly and dry completely to prevent corrosion.
Next, focus on lubrication methods to keep your shears operating effortlessly. Apply a drop of food-safe mineral oil or a specialized kitchen tool lubricant at the pivot point. Open and close the shears several times to distribute the oil evenly. Wipe away any excess to avoid attracting dirt.
Regularly cleaning and lubricating your kitchen shears not only improves cutting performance but also extends their lifespan, saving you time and money in the long run. Incorporate these simple maintenance steps into your routine for best results.
Frequently Asked Questions
Can I Sharpen Kitchen Shears Without Disassembling Them?
Yes, you can sharpen kitchen shears without disassembling them by carefully using sharpening stones. First, make sure proper blade alignment to avoid damaging the blades or creating uneven edges. Hold the shears firmly and run the sharpening stone along each blade’s edge at the correct angle. Take your time and check the sharpness frequently. Just be cautious, as disassembling often provides better access and results, but it’s not always necessary.
How Often Should I Sharpen Kitchen Shears?
Think of your kitchen shears like a trusty knife—they need regular care to stay sharp. You should sharpen them every few months, depending on how often you use them. Consistent blade maintenance keeps your cuts clean and your shears efficient. Also, proper storage, like keeping them dry and in a safe spot, prevents dulling and damage. By staying on top of these habits, you’ll extend their life and performance without hassle.
Are Electric Sharpeners Safe for Kitchen Shears?
Yes, electric sharpeners can be safe for kitchen shears if you handle them carefully. You’ll want to guarantee proper blade alignment before sharpening to avoid damaging the blades.
However, electric sharpeners might not offer the precision you get with sharpening stones, which give you more control and can better maintain your shears’ edge. If you choose electric, proceed slowly and check often to keep your blades sharp without ruining them.
Can Kitchen Shears Be Sharpened at Home or Need Professional Service?
You can absolutely sharpen kitchen shears at home—it’s like giving your scissors a fresh breath of life. With the right kitchen shear maintenance, you just need a few sharpening tools like a whetstone, diamond file, or even a handheld sharpener.
While professional service offers precision, understanding sharpening tools comparison helps you save time and money. So, grab your tools, and keep your shears slicing smoothly right in your own kitchen.
What Safety Tips Should I Follow While Sharpening Kitchen Shears?
You should always wear cut-resistant gloves to protect your hands during knife maintenance. Make certain the shears are clean and dry before sharpening to avoid slipping. Keep the blade alignment steady, sharpening each side evenly.
Work slowly and apply consistent pressure to prevent accidents. Use a stable surface and good lighting to see what you’re doing clearly. Finally, keep kids and pets away to guarantee a safe sharpening session.
Conclusion
Now that you know when to sharpen, how to disassemble, and which tools to use, you’re ready to sharpen, hone, and test your kitchen shears. Remember to clean, lubricate, and store them properly to keep them performing at their best.
Sharpen your kitchen shears with care, hone them for smoothness, and maintain them regularly. Sharp, well-maintained shears make cooking easier, safer, and more enjoyable every time you use them.