How to Clean a Kitchen Step by Step
A messy kitchen can feel overwhelming, especially when you’re not sure where to start. You’re not alone—many people struggle to keep up with the counters, dishes, and floors. Learning how to clean a kitchen step by step can make the task feel more manageable, and the right cleaning products can make each step easier.
Start by clearing clutter off your counters, then gather your cleaning supplies before tackling dishes and the sink.
Wipe down countertops and backsplash, degrease cabinet fronts and handles, and give the microwave a quick clean.
Don’t skip the fridge—clear out expired items and wipe shelves.
Finish with sweeping and mopping the floor.
Stick with this order, and you’ll keep your kitchen spotless with far less effort than you’d expect.
Key Takeaways
- Declutter and clear countertops first to expose dirt and make cleaning surfaces easier.
- Gather all cleaning supplies, then wash, sort, and air-dry dishes before tackling the sink.
- Clean countertops, cabinets, and appliances like the range, microwave, and refrigerator thoroughly.
- Sweep and mop floors last, using overlapping strokes and letting them air-dry completely.
- Finish with final touches like disinfecting handles, buffing surfaces, and maintaining regular upkeep.
Clear Off Counters and Clutter First

Before you grab a single cleaning product, walk through your kitchen and clear every surface. Pick up mail, mugs, random gadgets, and anything that doesn’t belong there. You can’t clean what’s buried under stuff, so clutter removal comes first, always.
You can’t clean what’s buried under stuff, so clutter removal comes first, always.
Grab a laundry basket or empty box and do a quick sweep. Toss trash immediately, relocate items that belong in other rooms, and set aside dishes for the sink. Don’t overthink it yet. You’re not organizing, you’re just clearing.
Once the counters are bare, you’ll see what you’re actually working with: crumbs, spills, sticky rings, and dust you didn’t notice before. This is also your chance to start counter organization by deciding what actually deserves prime real estate. Keep daily essentials like your coffee maker or knife block, and store the rest.
A clutter-free counter makes every other cleaning step faster, easier, and far more effective.
Gather Your Cleaning Supplies and Tools
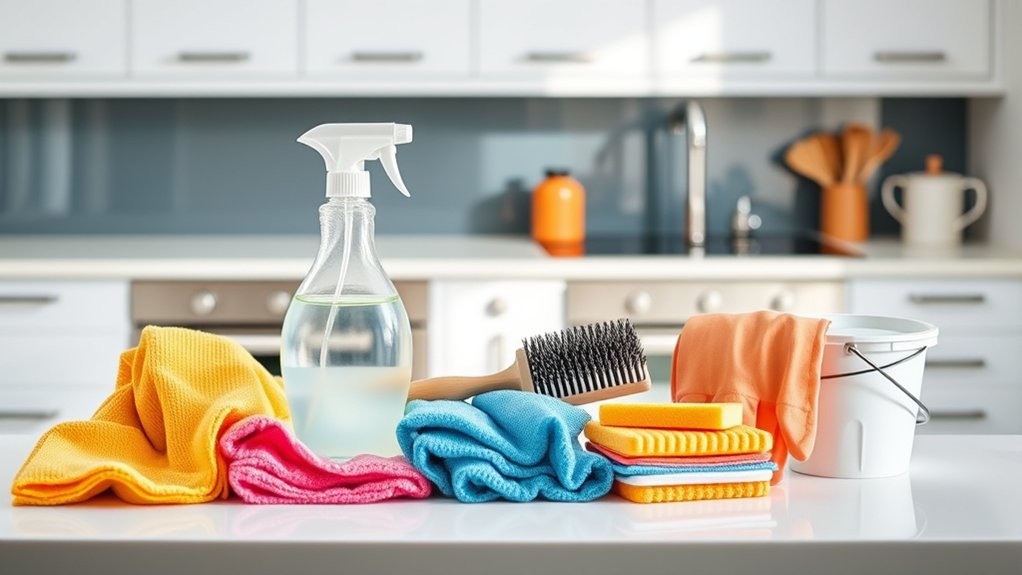
Before you scrub a single surface, gather everything you’ll need. That way, you won’t have to make dripping-glove trips across the kitchen. Grab all-purpose cleaner, degreaser, dish soap, and disinfectant, along with microfiber cloths, scrub brushes, and a sturdy bucket. Set everything on the counter so it’s ready when you need it.
Essential Cleaning Products Needed
Once you’ve got your supplies organized, cleaning your kitchen becomes a much faster job. Start with an all-purpose cleaner for countertops and tables, plus a degreaser for stovetops and range hoods. You’ll also need glass cleaner for windows and stainless steel appliances, along with dish soap for handwashing dishes and cleaning sponges.
Grab a disinfectant spray or wipes for cutting boards and high-touch surfaces like handles and switches. For eco friendly products, consider plant-based cleaners that cut grease without harsh chemicals. Natural cleaning solutions, like vinegar and baking soda, work well for deodorizing drains and scrubbing stubborn stains.
Don’t forget floor cleaner suited to your flooring type, oven cleaner for baked-on residue, and a stainless steel polish to keep appliances streak-free.
Must-Have Cleaning Tools
Since the right tools make cleaning faster and more effective, you’ll want to gather a few essentials before tackling your kitchen. Having these on hand keeps you ready to stick to your cleaning schedule without scrambling for supplies mid-task.
- Microfiber cloths – They trap dust and grime without scratching surfaces, and you can reuse them after washing.
- Scrub brushes – Choose different sizes for tackling tough stains on pots, pans, and grout.
- Rubber gloves – Protect your hands from harsh chemicals and hot water.
- Bucket or caddy – Keep supplies organized and portable as you move room to room.
Invest in smart storage solutions, like under-sink bins or wall-mounted racks, to keep your tools accessible and your kitchen clutter-free.
Organize Supplies Beforehand
Why dig through cluttered cabinets mid-clean when you can set everything up in advance? Gather your supplies into one caddy or bin before you start, so you’re not stopping every few minutes to search for a rag or spray.
Pull out your all-purpose cleaner, scrub brushes, microfiber cloths, trash bags, and gloves, and set them within reach. Clear your counters of food storage containers and small appliances. You’ll need that space to wipe down surfaces properly.
If you’re following a cleaning schedule, keep a checklist handy so you tackle each task in order without backtracking. This small step of preparation saves time, keeps you focused, and turns cleaning into a smooth, efficient process instead of a scattered one.
Wash Dishes and Clear the Sink

Where do you even start with a sink full of dirty dishes? Clearing them first gives you a clean workspace for everything else. Don’t let the pile intimidate you—break it into a simple process and you’ll move through it fast.
A sink full of dishes feels overwhelming until you break it down—then it’s just one simple step at a time.
- Scrape food scraps into the trash or compost. A sink scraper makes quick work of stuck-on bits before they clog your drain.
- Sort items by type. Group glasses, utensils, and pots so you’re not jumping back and forth.
- Wash with hot water and dish soap. Start with the least greasy items first to keep your water cleaner longer.
- Rinse and air-dry on a rack.
Once everything’s washed, wipe down the sink basin itself, scrubbing away residue and grime. Finish by disinfecting the faucet handles. A clear, clean sink instantly makes the whole kitchen feel more manageable.
Wipe Down Kitchen Countertops and Backsplash
Once your sink is clear, turn your attention to the countertops and backsplash. First, move any appliances, dishes, and other items out of the way so you have a clear surface to clean.
Next, grab an all-purpose cleaner and spray the countertops and backsplash. Wipe everything down, paying extra attention to any stubborn stains.
Clear Off Surfaces
Start by clearing everything off your countertops—appliances, dish racks, utensil holders, and any stray clutter—so you can access the entire surface. This step makes kitchen organization easier and prevents surface clutter from hiding grime.
Once everything’s off, sort items into categories before putting them back:
- Daily-use tools – knives, cutting boards, coffee makers
- Occasional appliances – blenders, toasters, mixers
- Decorative items – plants, fruit bowls, canisters
- Miscellaneous clutter – mail, keys, random objects that don’t belong in the kitchen
Find a designated spot for each category instead of piling everything back onto the counter. This process not only makes cleaning faster but also helps you spot items you no longer need, keeping your kitchen functional and clutter-free long after you finish wiping down surfaces.
Spray and Wipe Down
With your countertops clear, grab an all-purpose cleaner suited to your surface—whether it’s granite, laminate, or butcher block—and spray it generously across the counters and backsplash. Hold the bottle six inches away and use sweeping spray techniques to cover every inch evenly, including corners and edges where grime hides.
Let the cleaner sit for thirty seconds to break down grease and residue. Then grab a microfiber cloth and start wiping in consistent wipe patterns, left to right, then top to bottom, to lift dirt without streaking. Focus extra attention on the backsplash, since splatters often dry and stick there.
Finish by buffing the surfaces dry with a clean towel to prevent water spots. This step leaves your counters sanitized, streak-free, and ready for the next phase of cleaning.
Tackle Backsplash Stains
Even after a thorough wipe-down, some backsplash stains stick around and demand a closer look. Grease splatters, sauce splashes, and hard water spots often cling to tiles and grout lines, leaving dull patches behind. Tackle these stubborn marks with a targeted approach:
- Mix a paste of baking soda and water for grout stain removal.
- Apply the paste directly onto stained grout lines and let it sit for 10 minutes.
- Scrub gently with an old toothbrush to lift embedded grime.
- Wipe tiles with a vinegar-water solution to combat tile discoloration.
Rinse the area with a damp cloth and dry it thoroughly. This step restores your backsplash’s shine, leaving it bright, clean, and ready to impress.
Degrease Cabinet Fronts and Handles
Because cooking oils drift through the air and settle on every nearby surface, your cabinet fronts and handles often carry a sticky film you don’t even notice until you touch it. Mix warm water with a few drops of dish soap, then wipe doors and frames with a soft cloth, working in small circular motions to lift grease without scratching the finish.
That invisible greasy film on your cabinets builds up slowly—regular soft-cloth cleaning keeps it from ever taking hold.
For stubborn buildup, add a splash of white vinegar to your solution; its acidity cuts through grime that plain soap leaves behind. Rinse with a clean, damp cloth and dry immediately to prevent streaking or water spots on wood or laminate surfaces.
Handles and knobs need special attention since they’re touched constantly. Focus on handle sanitizing by scrubbing crevices with an old toothbrush dipped in your cleaning solution, then disinfect with a vinegar-water spray.
Finish with cabinet polishing using a microfiber cloth and a small amount of furniture oil, restoring shine and protecting surfaces from future grease accumulation.
Scrub Your Stovetop and Range Hood
Since your stovetop endures daily splatters and baked-on spills, it deserves a deeper clean than a quick wipe-down. Stovetop grime builds up fast, especially around burners and knobs, so tackle it with the right method for your surface:
- Gas stovetops: Remove grates and soak them in hot, soapy water while you wipe the surface with a degreaser.
- Glass or ceramic tops: Use a non-abrasive cleaner designed for glass to avoid scratching.
- Stainless steel: Wipe in the direction of the grain to prevent streaking.
- Knobs and dials: Pop them off if possible and scrub separately for a thorough clean.
Don’t forget your range hood. Wipe down the exterior with a degreasing spray, then remove range hood filters and soak them in hot water with dish soap to break down trapped grease. Dry everything thoroughly before reassembling.
Clean the Microwave Fast
While nobody enjoys scraping dried-on sauce from the microwave’s ceiling, you can skip the elbow grease with a simple steam trick. Fill a microwave-safe bowl with water and a few slices of lemon, then run it on high for three minutes.
The steam loosens grime clinging to the microwave interior, so you just wipe it away with a damp cloth. Don’t skip the door seal and the underside of the turntable, both of which trap splatters that harden over time.
If microwave odors linger after cleaning, add a tablespoon of baking soda to the water before steaming. It neutralizes smells instead of masking them. For stubborn stains near the vents, dip a cotton swab in vinegar and work it into the grooves.
Finish by drying the interior with a clean towel to prevent water spots. This whole process takes under ten minutes and leaves your microwave looking and smelling brand new.
Tackle the Refrigerator Inside and Out
Pull everything out of your fridge and wipe down the shelves and drawers with warm, soapy water. While you’re at it, check expiration dates and toss anything past its prime. Then group similar items together—like condiments, leftovers, and produce—so you can find what you need at a glance.
Wipe Down Shelves
Before you tackle the fridge, take everything out—condiments, leftovers, produce drawers, and all. With empty shelves, you’ll see every sticky spill and crumb you’ve been ignoring for weeks.
Mix warm water with a splash of dish soap, then wipe each shelf and drawer thoroughly. For glass shelves, let them reach room temperature first so they don’t crack under hot water. Dry everything before sliding it back into place.
While you’re at it, use this moment to improve your shelf organization:
- Group similar items together (dairy, sauces, snacks)
- Place frequently used items at eye level
- Reserve bottom shelves for raw meat
- Add shelf labeling so everyone in the house knows where things belong
This small step keeps your fridge functional long after cleaning day.
Organize and Discard Expired Items
How long has that jar of salsa been lurking in the back corner? Now’s the time to find out. Pull everything from your fridge, freezer, and pantry shelves, checking dates as you go. Toss expired items without hesitation—that wilted lettuce and crusty condiment packet aren’t doing you any favors.
While you’re at it, take stock of your kitchen inventory. Group similar items together: condiments with condiments, grains with grains. This makes it easier to see what you have and avoid buying duplicates on your next shopping trip.
Wipe down empty shelves and drawers before putting items back. Use clear bins or labels if clutter’s an issue. An organized fridge and pantry save you time, reduce waste, and keep your kitchen running smoothly.
Sweep and Mop the Kitchen Floor
Once you’ve cleared the counters and tackled the dishes, turn your attention to the floor. Good floor maintenance keeps your kitchen hygienic and extends the life of your flooring, so don’t skip this step.
Start by sweeping away crumbs, dust, and debris with a broom, working corners and under appliances where dirt tends to hide. Once you’ve cleared the surface, it’s time to mop:
- Fill a bucket with warm water and a floor-appropriate cleaner.
- Dip the mop, wring out excess liquid, and work in small sections.
- Use overlapping strokes to avoid streaks and missed spots.
- Rinse the mop frequently to prevent spreading dirty water.
Proper mop techniques matter here. Too much water can damage certain surfaces, while too little won’t lift grime effectively. Finish by letting the floor air-dry completely before walking on it, ensuring a clean, polished finish for your kitchen space.
Maintain a Clean Kitchen Every Day
Since a spotless kitchen rarely stays that way without daily effort, build small habits that keep messes from piling up. Wipe down counters after every meal, and don’t let dishes sit in the sink overnight. Run the dishwasher before bed, or hand-wash items right after you use them.
Good kitchen organization makes daily maintenance easier. Keep frequently used items within reach, and return tools to their designated spots after each use. Clutter invites mess, so resist stacking mail, keys, or random items on counters.
Take two minutes each evening to do a quick sweep: clear crumbs, straighten chairs, and empty the trash if it’s full. Check the fridge weekly for expired food, and give the stovetop a wipe after cooking to prevent buildup. These small, consistent actions prevent grease and grime from accumulating, saving you from major cleaning sessions later. A little effort daily keeps your kitchen consistently welcoming.
Frequently Asked Questions
How Often Should I Deep Clean My Entire Kitchen?
You should deep clean your entire kitchen once a month for the best results. This includes appliance maintenance, like wiping down your fridge coils and cleaning your oven’s interior, plus tackling storage organization by clearing out pantries and cabinets.
You’ll also want to wipe down walls, scrub grout, and declutter countertops. Staying consistent with this schedule keeps your kitchen running smoothly and prevents grime from building up over time.
What Natural Ingredients Work Best for Eco-Friendly Kitchen Cleaning?
For eco-friendly cleaning, you’ll want to stock up on white vinegar, baking soda, lemon juice, and castile soap. These natural ingredients cut grease, deodorize surfaces, and disinfect without harsh chemicals.
You can mix vinegar and water for countertops, sprinkle baking soda on stubborn stains, and use lemon juice to tackle odors in your sink or garbage disposal. They’re affordable, safe for your family, and gentle on the environment too!
How Do I Remove Stubborn Odors Lingering in My Kitchen?
Think of your kitchen as a canvas—lingering odors are the smudges that dull its story. To restore clarity, you’ll want to set out bowls of baking soda, nature’s quiet absorber, letting it draw out stale scents overnight.
Run air purifiers to cycle out what’s trapped, revitalizing the air like a cleansing breath. Wipe surfaces with vinegar for extra punch. You’re not just removing smells; you’re reclaiming your space’s fresh beginning.
Can I Clean a Kitchen Without Harsh Chemical Products?
Yes, you absolutely can! You’ll find plenty of eco friendly alternatives that tackle grease and grime just as well as harsh products. Mix vinegar and water for countertops, use baking soda to scrub sinks, and try lemon juice to cut through odors.
These chemical free solutions are gentle on surfaces, safe around food, and kinder to the environment. You’re not sacrificing cleanliness—you’re just choosing smarter, simpler ingredients you probably already have at home.
How Long Does a Full Kitchen Cleaning Typically Take?
You’ll usually spend 1 to 3 hours on a full kitchen cleaning, depending on size and clutter. If you’re tackling kitchen organization at the same time, add extra time for sorting drawers and cabinets.
Don’t forget appliance maintenance. Wiping down your fridge, oven, and microwave can take an additional 20-30 minutes. Breaking tasks into zones helps you stay efficient, and you’ll find regular upkeep shortens future cleaning sessions considerably.
Conclusion
Think of your kitchen as a garden you tend daily. You don’t wait for weeds to take over before you pull them; you pluck them as they sprout. Each wiped counter and washed dish is a small seed of care that keeps chaos from creeping in.
Follow these steps for how to clean a kitchen, and you’re not just cleaning a room; you’re cultivating a space that nourishes you, one tidy corner at a time.