How to Install a Kitchen Backsplash in 10 Steps
A kitchen backsplash can look intimidating when you’re unsure where to start, especially if you want polished results without costly mistakes. You’re not alone—many people struggle with measuring, cutting tiles, and creating clean grout lines.
This guide to how to install a kitchen backsplash breaks the project into simple steps.
To install a kitchen backsplash, gather tools and protect nearby surfaces. Choose tiles, measure the area, and plan your layout.
Clean and repair the wall, then mark a level starting line.
Spread adhesive and press tiles into place with spacers. Measure and cut edge pieces carefully.
Let the adhesive cure fully.
Apply grout, wipe away excess, and let it set. Seal the grout, caulk seams, remove haze, and inspect your finished backsplash for touch-ups and helpful finishing details.
Key Takeaways
- Gather tools, tiles, adhesive, grout, spacers, safety gear, and protective coverings for countertops, cabinets, outlets, and plumbing.
- Measure the backsplash, plan the tile pattern, mark level reference lines, and create a dry layout around corners and outlets.
- Clean and repair the wall. Spread compatible adhesive evenly, then press tiles into place using spacers and alignment guides.
- Allow the adhesive to cure. Apply grout with a float, remove excess with a damp sponge, and buff away haze.
- Seal the cured grout and caulk corners and countertop joints. Inspect the alignment, edges, gaps, and overall finish, then make any necessary touch-ups.
Gather Backsplash Tools and Materials

Before you begin, gather your backsplash tiles, tile adhesive, notched trowel, tile spacers, grout, grout float, level, tape measure, tile cutter, sponge, and safety glasses. Check each item before starting, and replace anything damaged or missing.
Gather every tile-setting tool before you begin, checking that each item is ready, safe, and within easy reach.
Choose a tile cutter suited to your material, such as a manual cutter for ceramic tile or a wet saw for thick porcelain. Keep a bucket, clean water, utility knife, pencil, and drop cloth nearby to simplify cleanup and protect your counters.
Wear safety glasses whenever you cut tile, and use gloves when handling sharp edges or adhesive. Confirm that your adhesive and grout work with your tile and wall surface, and check their expiration dates.
Gather paper towels and a dust mask if cutting creates debris. Your tools should support the installation without forcing rushed decisions about Kitchen decor or color schemes.
Once everything sits within reach, you’ll work more safely, efficiently, and neatly from preparation through cleanup.
Choose Tile and Plan the Layout

Choose a tile that suits your kitchen’s style, fits your budget, and works with the wall surface. Compare ceramic, porcelain, glass, and natural stone options, considering durability, maintenance, thickness, and required cutting tools.
Order about 10 percent extra tile to cover cuts, breakage, and future repairs.
Use color coordination to connect the backsplash with your cabinets, countertops, flooring, or appliances. Select a dominant shade, then add a complementary or contrasting accent if you want visual interest.
Review tile samples in your kitchen’s lighting before deciding, since colors can appear different throughout the day.
Explore tile patterns such as running bond, stacked, herringbone, or basket weave. Your pattern affects waste, difficulty, and the room’s visual scale.
Measure the backsplash area, including outlets and corners, and calculate the tile quantity. Find the wall’s centerline, then make a dry layout on a flat surface or use spacers to test alignment.
Plan where cuts will fall, keeping them balanced and less noticeable. Mark the layout clearly before installation.
Clean, Repair, and Protect the Wall
Remove outlet covers, switch plates, and nearby hardware, then clean the backsplash wall with a degreaser to eliminate grease, dust, and residue. Wipe with a damp cloth afterward and let the surface dry completely. Good wall preparation helps tile adhesive bond securely.
Inspect the wall for loose paint, nail holes, cracks, or water damage. Scrape away anything unstable, fill small holes with patching compound, and sand repairs smooth.
Replace severely damaged drywall rather than covering it. Vacuum dust, then wipe the surface again.
| Wall condition | Action |
|---|---|
| Grease or residue | Degrease and rinse |
| Small holes or cracks | Patch and sand |
Protect countertops and cabinets with drop cloths or painter’s tape. Cover outlets and plumbing openings temporarily so debris and moisture stay out.
Don’t install tile over damp, peeling, or contaminated surfaces. Allow every repair and cleaning step to dry before continuing. Keep the wall bare and sound for the next installation step.
Mark a Level Starting Line
Find the lowest point where the countertop meets the wall, then measure upward to mark the tile’s starting height. Use your planned backsplash height to place a clear pencil mark at that point. Don’t rely on the countertop, since it may slope slightly.
Set a long level against the wall with its edge aligned to your mark. Adjust it until the bubble centers, then draw a light, continuous line across the installation area.
If the wall extends beyond your level, shift the tool while keeping its bubble centered, and continue the line without changing height.
Check the line from several angles to confirm it remains straight and visible. For a backsplash with decorative patterns, identify the design’s visual center before finalizing the height.
You may need to balance the pattern around a focal area, such as the range. Mark vertical reference lines at corners or key features, but keep every guide light enough to erase later. This level baseline will guide your layout.
Measure and Cut Tiles Precisely
With your level baseline and reference lines in place, measure each tile position individually, accounting for grout joints and any edge trim. Record every measurement, especially around outlets, corners, windows, and cabinets. Don’t assume opposite walls match; kitchens often contain slight variations.
- Account for your layout. Dry-measure full and partial pieces to preserve your Tile patterns, then mark cuts on the tile’s face with a wax pencil. Include the joint width, but don’t double-count trim.
- Use the right tool. Score ceramic or porcelain with a tile cutter, and use a diamond blade for thick, textured, or glass tile. Wear eye protection and follow the tool’s instructions.
- Cut carefully. Support the tile, keep your hands clear, and make several controlled passes rather than forcing the blade. Smooth sharp edges with a rubbing stone.
Check each piece against its opening before labeling it. Keep grout colors in mind, since contrasting grout can emphasize uneven cuts. Set aside chipped pieces for small end cuts.
Apply Adhesive and Set the Tiles
Spread the adhesive evenly across the wall using a notched trowel. Then, carefully align each tile and press it firmly into place to ensure a strong bond.
Spread the Adhesive
Once the adhesive is mixed to the manufacturer’s recommended consistency, spread it over a small section of the wall with a notched trowel. Choose a suitable adhesive for your tile and wall surface, and check the manufacturer’s instructions before mixing.
Use these trowel techniques:
- Hold the trowel at a consistent angle to create uniform ridges.
- Comb the adhesive in one direction, applying steady pressure for even coverage.
- Cover only an area you can tile before the adhesive skins over.
Press the flat side of the trowel into thick spots, then scrape excess adhesive back into the bucket. Keep the layer thick enough to fill the tile’s texture, but don’t bury the ridges.
Frequently inspect the spread for gaps, lumps, or dry patches, and add fresh adhesive when needed. Clean stray adhesive from nearby surfaces immediately with a damp sponge.
Align the Tiles
Begin setting the tiles while the adhesive is fresh, starting at your layout’s reference line or most visible corner. Place each tile carefully, following your planned Tile patterns and maintaining consistent spacing with tile spacers.
Check the first row with a level, then adjust its position before the adhesive grabs. Continue across the wall, keeping grout lines aligned horizontally and vertically.
Use a straightedge to verify that tile faces follow the intended plane, and inspect your layout after every few tiles. For color coordination, compare pieces from different boxes as you work, since slight shade variations may appear.
Cut edge tiles only after confirming measurements, and position factory edges toward visible areas whenever possible. Keep corners, outlets, and cabinet lines in mind so the finished arrangement looks balanced.
Press Tiles Firmly
Press each tile firmly into the adhesive with a slight twisting motion to create full contact without shifting its position. You’ll strengthen the bond while keeping the surface aligned.
Apply firm pressure across the tile’s center, then along its edges, but don’t squeeze adhesive into the grout lines. Work in small sections so the adhesive stays workable.
- Check the tile face for adhesive smears, and wipe them away immediately with a damp sponge.
- Use a level or straightedge after every few tiles to confirm the backsplash remains flat and aligned.
- Insert spacers between tiles to maintain consistent gaps for grout and prevent tiles from drifting.
If a tile moves, lift it carefully, scrape away excess adhesive, and reset it. Don’t press tiles harder than necessary, since excessive force can push adhesive out or crack the tile.
Let the adhesive cure according to the manufacturer’s instructions.
Wait for the Adhesive to Cure
Let the adhesive cure for the time recommended by the manufacturer before you grout or move on to sealing. Check the product label, because temperature, humidity, tile size, and the surface material can affect the schedule.
Don’t rely on the surface feeling dry. Adhesive drying on top doesn’t always mean the layer beneath has set.
Keep the backsplash undisturbed during the curing process. Avoid pressing tiles, wiping across joints, leaning objects against the wall, or exposing the area to steam and splashes.
Maintain steady room conditions, and use gentle ventilation if the manufacturer allows it. Excess moisture or cold air can slow curing and weaken the bond.
After the recommended period, inspect the installation. Look for loose tiles, movement, or adhesive that remains soft around the edges.
If anything shifts, allow more time and follow the product instructions for correction. Don’t rush this step; full curing gives your backsplash the stable foundation it needs for the remaining work.
Mix and Apply the Grout
Once the adhesive has fully cured, mix the grout according to the manufacturer’s instructions, adding only the recommended amount of water. Let the mixture rest briefly, then remix it until smooth and creamy. Choose a grout color that complements your tile and suits your kitchen’s style.
- Scoop grout onto a rubber float, then hold the float at a 45-degree angle. Push the grout diagonally across the tile faces, forcing it firmly into every joint.
- Work in small sections so the grout doesn’t begin hardening before you can clean it. After several minutes, scrape excess grout from the tile with the float’s edge.
- When the surface looks slightly dull, wipe it with a damp, well-wrung sponge. Rinse the sponge often, and use light passes to avoid pulling grout from the joints.
Let the grout firm up, then buff away the remaining haze with a clean, dry cloth. Don’t rush grout sealing; allow the grout to cure as directed before proceeding.
Seal the Grout and Caulk the Seams
After the grout has cured for the recommended time, apply a penetrating grout sealer with a small brush or applicator, keeping it off the tile as much as possible. Work in small sections, covering every grout joint evenly.
Let the sealer soak in for the time specified on the label, then wipe away excess from the tile before it dries. Repeat grout sealing if the product instructions call for a second coat.
Allow the sealed grout to cure fully before exposing it to moisture.
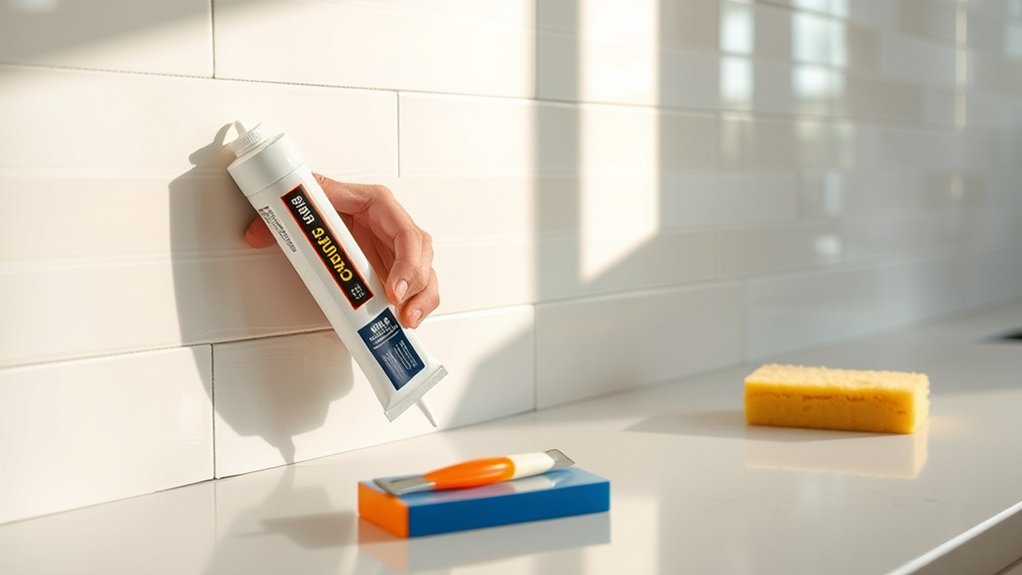
Next, prepare for seam caulking where the backsplash meets the countertop, cabinets, or adjacent walls. These joints can shift slightly, so use flexible, mildew-resistant kitchen and bathroom caulk rather than grout.
Apply painter’s tape along both sides of each seam for clean edges. Run a steady bead, then smooth it with a damp finger or caulk tool.
Remove the tape immediately, and let the caulk cure according to the manufacturer’s directions before using the area.
Remove Grout Haze and Check Your Work
Wipe away any excess grout haze with a clean, damp sponge before it hardens. Then, inspect the tile alignment and make sure the seals and edges look neat and secure.
If you notice any gaps or uneven areas, fix them now.
Remove Excess Grout Haze
When the grout has firmed up, buff the tile faces with a clean, dry microfiber cloth to remove the remaining haze. Work in small circles, turning the cloth often so you don’t spread residue across clean tiles. For stubborn film, lightly dampen a sponge with clean water, wipe once, and immediately dry the surface.
Don’t soak the joints, because excess moisture can weaken curing grout.
- Replace your rinse water frequently to prevent cloudy streaks.
- Use a manufacturer-approved haze remover only after the grout cures fully.
- Protect nearby counters and cabinets from drips with towels.
View the backsplash under bright, angled light, then repeat gentle buffing wherever dull patches remain. Your grout color selection and tile pattern options will look their best once every tile face feels smooth, clean, and dry.
Avoid acidic household cleaners, which can etch tile or discolor fresh grout.
Inspect Tile Alignment
With the grout haze removed, inspect the backsplash under bright, angled light to check that tile edges line up and joints remain consistent. View the surface from several angles, since shadows can reveal uneven courses, lippage, or drifting lines.
Compare each row with your layout marks, and confirm that tile spacing matches your planned joint width. Pay special attention to corners, outlets, and connections, where small errors become more noticeable.
If you find a tile that sits out of line, correct it before the adhesive fully cures, following the manufacturer’s timing. Check decorative patterns for continuity, ensuring colors, shapes, and directional details flow as intended.
Step back periodically to assess the entire backsplash, then make final adjustments while you can still move individual tiles. Record any areas requiring attention before proceeding.
Check Seals and Edges
Once the grout has firmed up, inspect every seal and edge for gaps, pinholes, or smears. Shine a flashlight across the backsplash to reveal uneven joints and leftover grout haze.
Wipe the tiles gently with a dry microfiber cloth, then buff stubborn haze with a manufacturer-approved cleaner. Don’t scrub aggressively, or you could damage fresh grout.
- Check the countertop joint, cabinet sides, and corners for continuous caulk.
- Press lightly along each joint; remove loose material and refill thin spots.
- Confirm tile faces look clean, grout lines appear consistent, and no edges shift.
Apply a neat bead of flexible, mildew-resistant caulk where tile meets the counter, wall, or cabinets. Smooth it with a damp finger or tool, remove excess immediately, and let everything cure according to the product label.
Your backsplash is ready when the seals remain smooth, clean, and watertight.
Frequently Asked Questions
Can I Install a Backsplash Over Existing Tile?
Yes, you can install a backsplash over existing tile if the surface is firmly attached, clean, dry, and reasonably flat. Remove loose pieces, repair cracks, and scuff glossy tile so adhesive bonds properly.
You’ll need to account for added thickness around outlets and edges. Lightweight Decorative mosaic sheets work well, while Peel and stick options offer an easier installation.
Follow the manufacturer’s adhesive and grout recommendations for a durable finish.
How Long Does a Kitchen Backsplash Installation Typically Take?
You’ll typically finish a kitchen backsplash installation in one to three days. You’ll spend several hours preparing the wall, measuring, and cutting tiles.
Setting the tile may take another day, especially if you’re using intricate tile patterns. Allow 24 hours for the adhesive to cure, then apply grout and wait another day before sealing.
Grout colors, tile size, wall repairs, and your experience can extend the timeline, so plan extra time.
Should Electrical Outlets Be Removed Before Installing Backsplash Tile?
Yes, you should remove electrical outlets’ faceplates before installing backsplash tile, but don’t disconnect the outlets unless you’re qualified or an electrician is handling the work.
First, shut off power at the breaker and verify it’s off. Remove each cover, then protect Electrical wiring from adhesive and dust.
Check Outlet positioning as you lay tile, using approved spacers or box extenders if the finished surface sits farther forward. Reinstall covers afterward.
Can Backsplash Tiles Be Installed Behind a Range Hood?
Yes, you can install backsplash tiles behind a range hood, and doing so creates a finished, cohesive appearance.
Before starting tile installation, remove or loosen the range hood according to the manufacturer’s instructions, then protect its wiring and surfaces.
Extend the tile across the entire wall area, including behind the hood, unless the manufacturer specifies clearance requirements.
Let the adhesive and grout cure fully before reinstalling the hood and checking ventilation.
How Do I Maintain and Clean My Finished Backsplash?
You’ll keep your finished backsplash looking fresh by wiping spills promptly and cleaning it weekly. Does frequent cleaning prevent damage? Yes, regular care limits grease buildup and protects grout.
Use warm water, mild dish soap, and a soft cloth; avoid abrasive pads and harsh chemicals. For stubborn spots, apply a gentle paste, then rinse and dry.
Your Cleaning tips should include sealing porous grout as needed. Follow a Maintenance schedule that checks grout monthly for cracks or discoloration.
Conclusion
With your kitchen backsplash installed, step back and admire how each tile aligns, as if the pattern had been waiting for your kitchen all along. Wipe away the last haze, seal the grout, and caulk every seam so moisture can’t sneak behind your work.
Then restore your outlets and clear your tools. When the light catches the finished surface and your countertop suddenly looks refreshed, you’ll realize a careful weekend project can make the whole room feel new.