How to Repaint Kitchen Cabinets in 10 Steps
Worn, outdated cabinets can make your whole kitchen feel tired, even when the rest of the space looks great. You’re not alone—many homeowners struggle to get a smooth, durable finish, but the right products and preparation can make repainting much easier.
Repaint kitchen cabinets in 10 steps: identify the material and choose compatible paint; gather brushes, rollers, primer, sandpaper, and safety gear; remove and label doors, drawers, and hardware; protect the workspace; clean and degrease surfaces; repair damage and sand lightly; apply bonding primer; paint thin, even coats; let everything cure fully; then reinstall hardware and protect the finish.
For detailed techniques, drying guidance, and maintenance tips, keep going.
Key Takeaways
- Identify the cabinet material, choose compatible paint and primer, and gather brushes, rollers, sandpaper, tape, and protective supplies.
- Remove and label doors, drawers, hinges, and hardware to ensure accurate reassembly.
- Clean, repair, and lightly sand every surface, then remove dust before applying primer.
- Apply thin, even paint coats with appropriate brushes or rollers, allowing each coat to dry completely.
- Let the finish cure fully, then reinstall hardware and maintain cabinets with gentle cleaning and prompt touch-ups.
Check Cabinet Materials and Choose Your Paint
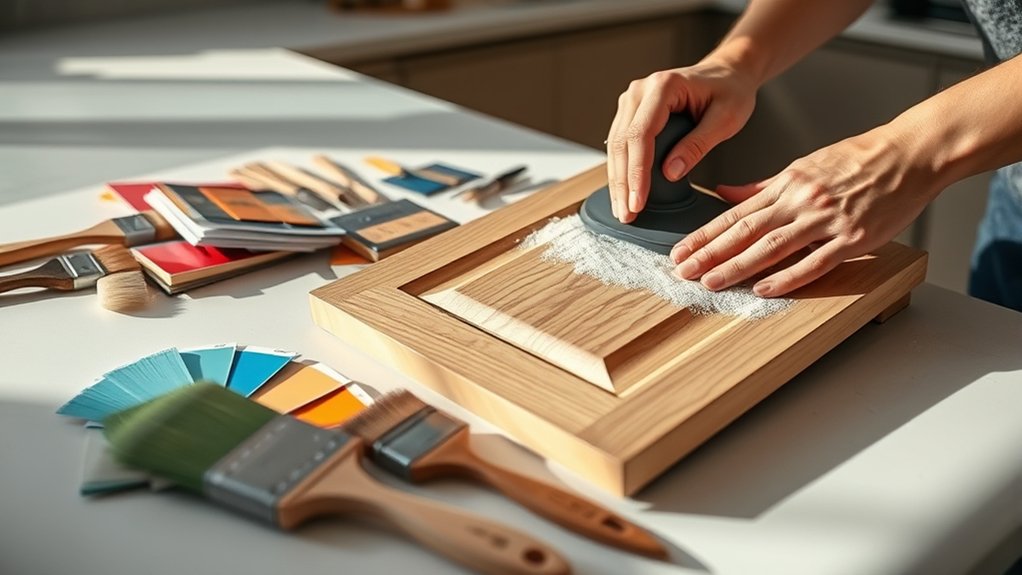
Before you choose a paint, check whether your cabinets are solid wood, MDF, laminate, or veneer, since each material needs a slightly different preparation process. Identify the surface before comparing colors, sheens, and formulas.
Solid wood accepts most quality cabinet paints after you smooth imperfections and seal porous areas. MDF has a dense, uniform face, but its exposed edges absorb moisture, so choose a coating that creates a durable seal.
Laminate requires a paint specifically labeled for slick, nonporous surfaces. Veneer can accept paint when it’s firmly attached, but repair lifting edges before finishing.
Consider material compatibility, not just appearance. Read the paint label to confirm that the formula suits your cabinet substrate and kitchen conditions.
Water-based acrylic or urethane paints generally offer low odor and easy cleanup, while alkyd options can level smoothly and resist wear. Select a satin or semi-gloss sheen for washable cabinet finishes.
Finally, verify the color under your kitchen’s lighting before committing.
Gather Cabinet Painting Supplies
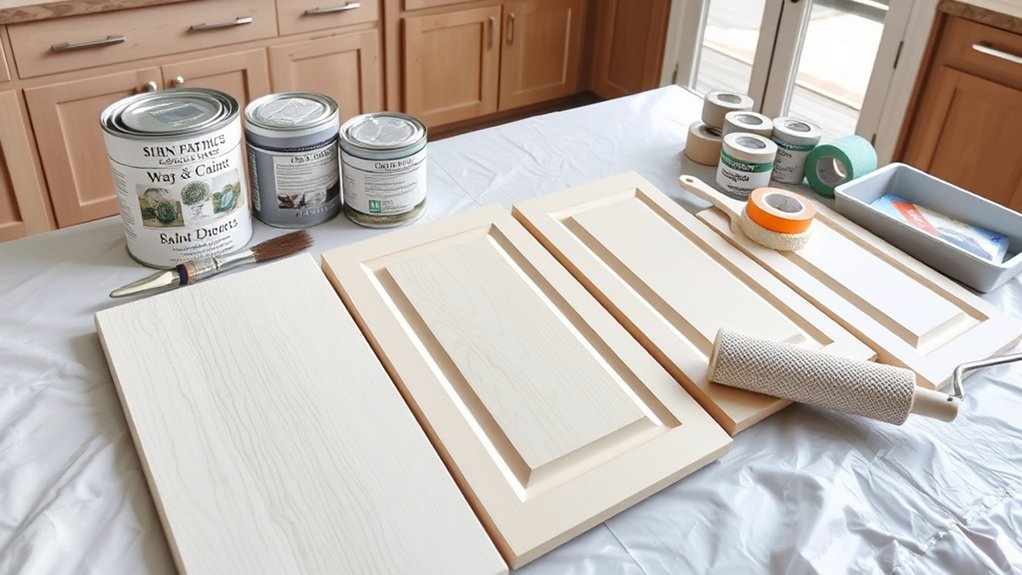
Before you start, gather your essential painting tools, including brushes, rollers, trays, and sandpaper. You’ll also need cleaning and preparation supplies, such as degreaser, cloths, filler, and painter’s tape. Finally, don’t forget protective equipment and materials, including gloves, safety glasses, a mask, and drop cloths.
Essential Painting Tools
Gather your painting supplies before you remove the cabinet doors or open a paint can. Choose high-quality angled brushes for edges, corners, and narrow frames, then add a mini foam roller for smooth, even coverage across broad panels.
Keep a paint tray, liners, stir sticks, and a can opener nearby so you won’t interrupt your work. Use measuring cups or marked containers for accurate Color mixing, especially when combining custom shades or additives.
Select separate tools for different Finish types, such as water-based and oil-based products, and don’t reuse brushes without confirming compatibility. Include painter’s tape, drop cloths, disposable gloves, and a sturdy step stool.
A small detail brush helps you reach grooves, while a sanding block supports light smoothing between coats. Store everything together for easy access.
Cleaning and Preparation Supplies
Once your painting tools are ready, assemble supplies that will clean, repair, and prepare each cabinet surface. For cabinet cleaning, choose a degreasing cleaner, warm water, clean rags, and nonabrasive scrub pads.
A bucket and spray bottle help you work efficiently, while a toothbrush reaches grooves and hardware openings. For surface prep, gather fine-grit sandpaper or sanding sponges, a sanding block, and a vacuum or tack cloth to remove dust.
Keep wood filler handy for dents, cracks, and old hardware holes, plus a putty knife for smooth application. Use a scraper to lift peeling finish, and keep replacement screws or hinges nearby if needed.
Remove doors and drawers before cleaning, labeling each piece so you’ll reinstall everything correctly. Let every surface dry fully before sanding or repairing it.
Protective Equipment and Materials
Protect yourself and your workspace with safety glasses, chemical-resistant gloves, and a dust mask or respirator rated for paint fumes and sanding dust. Wear long sleeves, closed-toe shoes, and personal protective equipment suited to each product’s label.
Keep a drop cloth, plastic sheeting, and painter’s tape nearby to shield floors, counters, appliances, and walls from drips and overspray. Set out disposable liners, clean rags, and a sturdy waste container for used materials.
For environmental safety, open windows, use fans to improve ventilation, and avoid painting near flames, pilot lights, or heat sources. Store cleaners, primers, and paints securely, and never mix chemicals.
Keep children and pets away from the work area. Before starting, read every product label and follow its handling, drying, and disposal instructions.
Remove and Label Doors, Drawers, and Hardware
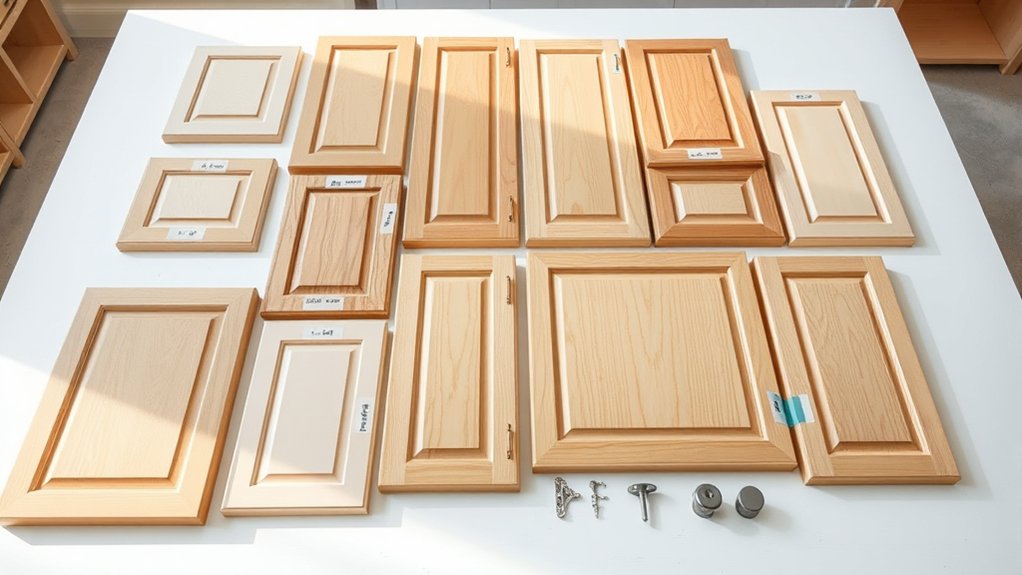
Before you remove anything, label each door and drawer so you’ll know exactly where it belongs. Carefully remove the hardware, and keep the screws and hinges together in labeled bags. As you work, organize the drawers and hardware to make reassembly easier.
Label Each Door
Label each cabinet door, drawer, and its hardware as you remove them so everything returns to the correct spot. Use a labeling system that matches every piece with its original cabinet opening.
Write a number inside each opening, then place the same number on the corresponding door or drawer. Add a brief note if pieces look similar or fit a particular side.
For larger kitchens, use color coding by cabinet section, such as blue for the island and green for upper cabinets. Mark hinges, screws, and pulls with matching numbers and store each set in a labeled bag.
Keep a simple diagram or phone photo as a backup reference. Don’t rely on memory; consistent labels prevent misplaced parts and make reassembly faster after painting.
Review every label before moving pieces away.
Remove Hardware Carefully
Remove cabinet doors, drawers, and hardware carefully to avoid damaging edges, hinges, or screw holes. Before hardware removal, photograph each cabinet’s placement and mark its matching door or drawer with painter’s tape.
Use a small, consistent code, such as A1, on both pieces. These labeling techniques will simplify reassembly.
| Part | Identification |
|---|---|
| Door | Match cabinet opening |
| Drawer | Match drawer position |
Support each door as you loosen hinge screws, and keep your screwdriver aligned to prevent stripped heads. Lift doors and drawers straight out rather than twisting them.
Remove knobs, pulls, hinges, and catches gently, checking for paint buildup that may resist movement. Place each component beside its labeled piece while you work, and inspect edges for chips or cracks.
If a screw won’t turn, apply light pressure and stop before damaging the surrounding wood.
Organize Drawers and Screws
Once the doors and drawers are off, organize their screws and hardware so every piece returns to its original location. Start your drawer organization by numbering each drawer with painter’s tape, then mark the matching cabinet opening with the same number.
Place each drawer’s screws, pulls, hinges, and bumpers in a separate resealable bag. Label every bag clearly, noting its cabinet number and hardware type.
For efficient screw storage, keep the bags together in a small box or divided container, away from paint and sanding dust. If hardware looks identical, don’t assume it’s interchangeable; subtle differences can affect alignment.
Photograph unusual hinge positions before removal, and save those images on your phone. Keep the labeled parts nearby during reassembly, so you won’t waste time searching or guessing.
Protect Your Kitchen and Clean Every Surface
Before you begin painting, protect your kitchen from dust, drips, and cleaning products. Remove dishes, appliances, rugs, and countertop items from the work area. Cover countertops, floors, nearby walls, and the sink with plastic sheeting or drop cloths, then secure the edges with painter’s tape. Open windows and use a fan to improve ventilation, but keep dust away from wet paint.
Wipe each cabinet door, drawer front, frame, and exposed surface with a degreasing cleaner. Pay special attention to areas around handles, knobs, the stove, and sink, where grease collects. Use a clean cloth and fresh water to remove cleaner residue, then let every surface dry completely.
Labeling doors and hardware now supports organized Cabinet hardware choices later and helps you coordinate your Kitchen color schemes. Dispose of greasy rags safely, and keep cleaning products away from children and pets. Don’t start painting until the workspace feels clean, dry, and protected.
Sand Cabinets for Better Paint Adhesion
Lightly sand every cabinet door, drawer front, frame, and exposed surface to create a texture that helps primer and paint bond. Use 120- to 150-grit sandpaper for previously painted or sealed surfaces, working with the grain whenever possible.
Lightly sand cabinet surfaces with 120- to 150-grit paper to dull the finish and help primer and paint bond securely.
You don’t need to remove the existing finish; focus on dulling its shine and smoothing uneven areas. For detailed profiles and corners, use a sanding sponge so you can follow the contours without gouging the wood.
Vacuum the dust, then wipe each component with a clean, slightly damp microfiber cloth. Let everything dry completely before priming.
Effective cabinet sanding depends on consistent, gentle pressure rather than aggressive scrubbing. Wear a dust mask and eye protection, especially when sanding inside the kitchen.
Check every surface under bright light, and repeat sanding where glossy patches remain. Careful surface prep gives primer a reliable grip and helps your final coat look smoother and last longer.
Repair Damage and Fill Hardware Holes
Inspect each door, drawer front, and cabinet frame for dents, cracks, loose joints, or chipped edges, then repair the damage before priming. Tighten loose screws, reglue separated joints, and replace damaged wood where necessary.
Let repairs cure fully, then sand them flush.
For effective hardware repair, remove old knobs, pulls, and hinges. Fill unused holes with wood filler, pressing it slightly below the surface to allow for sanding.
If holes are oversized or damaged, glue in wood dowels, trim them level, and apply filler around them. Your surface filling should create a smooth, stable foundation without covering areas that need to move.
- Scrape away loose paint and splinters.
- Use epoxy for deep cracks or missing corners.
- Apply filler in thin layers.
- Let each layer dry completely.
- Sand repaired spots smooth with fine-grit paper.
Wipe away dust after sanding, and check each area under good lighting. Run your hand across the surfaces to feel for dips or ridges.
If you find any imperfections, repeat the filling and sanding process. Don’t rush this step, because imperfections may remain visible after painting.
Prime the Doors, Drawers, and Cabinet Boxes
Choose a primer that works well with your cabinet material and the paint you plan to use. Apply thin, even coats to the doors, drawers, and cabinet boxes, and let each coat dry completely before adding the next. This will give your finish paint a smooth, durable base.
Choose the Right Primer
The right primer helps paint adhere evenly and prevents stains, wood tannins, and old finishes from bleeding through. Start by identifying each surface: wood, laminate, thermofoil, or previously painted cabinetry.
Choose a bonding primer for slick finishes and a stain-blocking formula for knots, smoke residue, or dark colors. Check the label to confirm compatibility with your chosen water- or oil-based topcoat.
Consider low-odor products if you’re working indoors, and select a formula suited to kitchen moisture and frequent cleaning. Before buying, confirm the primer’s drying time and cleanup requirements.
- Use bonding primer for glossy surfaces.
- Choose shellac or oil primer for stubborn stains.
- Select water-based primer for easier cleanup.
- Match the formula to your cabinet material.
- Test compatibility on a hidden spot.
Read the label carefully before priming your doors, drawers, and cabinet boxes.
Apply Even Primer Coats
Once the primer matches your cabinet material, apply a thin, even coat to the doors, drawers, and cabinet boxes. Use a high-quality brush for corners and detailed edges, then switch to a small foam roller for broad, flat surfaces.
Work in the direction of the wood grain, and don’t overload your tools. Heavy primer can drip, sag, or hide details. Keep each coat light, and smooth visible ridges before the primer dries.
Remove doors and drawers beforehand, labeling hardware and placement to simplify reassembly. Prime cabinet boxes in sections, checking corners and face frames for missed spots.
Let the primer dry fully, then sand gently with fine-grit paper and remove dust. Good coverage supports accurate color matching and helps your chosen finish options look smooth, durable, and consistent.
Paint Kitchen Cabinets in Thin Coats
Apply a thin, even coat of cabinet paint with a high-quality brush, roller, or sprayer, working in the direction of the wood grain. Keep your strokes controlled, and don’t overload your tool. Thin layers reduce drips, brush marks, and uneven coverage while creating a smoother finish.
Apply thin, controlled coats in the direction of the grain to create a smooth, even cabinet finish.
Pay attention to these details:
- Check paint consistency; stir thoroughly and thin it only if the label recommends it.
- Use brush techniques that follow the grain and smooth wet edges before they set.
- Roll broad, flat panels with light pressure, then inspect the surface from several angles.
- Spray in overlapping passes, maintaining a steady distance from the cabinet.
- Paint edges and corners carefully, removing excess paint before it gathers.
Work methodically from one section to the next, keeping a wet edge so each area blends smoothly. If the first coat looks slightly transparent, don’t compensate with a heavy application.
Let it dry according to the product label, then apply another thin coat for more even color and durable coverage.
Let the Paint Cure Before Reinstalling
After the final coat feels dry, give the cabinets enough time to cure before reinstalling them. Dryness only means the surface no longer feels wet; the paint may still remain soft underneath. Follow the product label’s curing guidance, and allow extra time when humidity is high, temperatures are low, or you applied several coats.
Keep each door and drawer in a clean, dry, well-ventilated area while the coating hardens. Support pieces on painter’s pyramids or another method that limits contact, and avoid stacking them.
Don’t judge readiness by the Paint color alone, because a uniform appearance doesn’t guarantee a hardened surface. Test an inconspicuous edge with a light touch; if it feels tacky or dents easily, wait longer.
Patience improves Finish durability and helps prevent sticking, imprints, and premature wear during everyday use. When the recommended cure time has passed and the surfaces feel firm, you can move on to the next step carefully.
Allowing a full cure also helps the coating withstand kitchen moisture, heat, and frequent cleaning.
Reinstall Hardware and Protect the Finish
With the paint fully cured, you can reinstall the hardware and return each door and drawer to its original position. Match every piece to its original location, then tighten screws gently to avoid chipping the fresh coating. If a screw spins freely, use a slightly longer replacement or a suitable anchor rather than forcing it.
For reliable hardware installation, follow these steps:
- Place a soft towel beneath each door while you work.
- Align hinges before tightening screws fully.
- Reattach handles with a hand screwdriver, not a drill.
- Wipe fingerprints away using a soft, damp cloth.
- Test each door and drawer for smooth movement.
Good finish protection keeps your work looking fresh. Add felt pads where doors contact the cabinet frame, and avoid abrasive cleaners or harsh chemicals.
Wait several days before washing surfaces, since the finish may continue hardening after it feels dry. Lift objects instead of dragging them across painted shelves, and address chips promptly with matching touch-up paint.
Periodically check loose hardware, tightening it carefully to prevent movement and damage.
Frequently Asked Questions
How Much Does It Cost to Repaint Kitchen Cabinets Professionally?
You’ll typically pay $1,500–$4,000 to have kitchen cabinets professionally repainted, though costs vary by kitchen size, cabinet condition, location, and finish. Labor usually covers preparation, cabinet cleaning, sanding, priming, and spraying or brushing multiple coats.
Paint color selection may affect pricing if you choose specialty products or intricate finishes. Smaller kitchens might cost around $800, while large or detailed projects can exceed $6,000.
Request several itemized quotes before hiring a professional.
How Long Does Repainting Kitchen Cabinets Typically Take?
You’ll typically spend three to five days repainting kitchen cabinets, like watching a caterpillar emerge as a butterfly. Day one covers cleaning, sanding, repairs, and priming; painting usually takes another one or two days, with drying time between coats.
Your timeline may stretch to a week if you choose multiple Color options, complex detailing, or slow-curing paint types. Professional crews might finish faster, while extensive damage or humidity can add time.
Can You Repaint Cabinets Without Removing the Doors?
Yes, you can repaint cabinets without removing the doors, but you’ll need careful preparation. Clean and degrease every surface, lightly sand, and protect countertops, floors, and hardware.
Remove or mask the Cabinet hinges so paint won’t clog them or affect alignment. Apply thin, even coats with a quality brush or sprayer, allowing proper drying time between coats.
However, removing doors usually improves access, appearance, and Paint durability, especially around edges and corners.
How Often Should Kitchen Cabinets Be Repainted?
You should repaint kitchen cabinets every 5–10 years, depending on wear, moisture, sunlight, and cleaning habits. If you notice peeling, fading, stains, or chipped surfaces, repaint sooner.
Strong cabinet durability can extend the interval, while busy kitchens may need more frequent touch-ups. Your paint selection also matters: choose a durable, washable cabinet enamel for longer-lasting results.
Inspect your cabinets annually, repair damage promptly, and refresh the finish when it no longer looks clean or protects the wood.
Should You Hire a Professional or Repaint Cabinets Yourself?
You should repaint cabinets yourself if you’re comfortable with preparation, patience, and detailed work. You’ll save money and control your color choices, but you’ll need to clean, sand, prime, and apply careful painting techniques for a durable finish.
Hire a professional when you have extensive cabinetry, intricate details, limited time, or want flawless results. Although professional work costs more, it can prevent visible mistakes, uneven coverage, and premature peeling while improving your kitchen’s appearance.
Conclusion
Your kitchen’s transformation is almost complete. After the final coat cures, reinstall each door, drawer, and handle carefully. The smallest mistake could mar your fresh finish.
Then step back and take in the reveal: brighter color, smoother lines, and a space that feels entirely yours. Don’t rush this last moment.
Protect your newly painted kitchen cabinets with gentle cleaning and patience, and they’ll reward you every day. Soon, you’ll wonder why you waited so long to make the change.